Filter Forge Animator is a standalone desktop program that allows you to create keyframe animation from static Filter Forge filters. It operates on familiar Filter Forge filters without the need to install the main Filter Forge software.
Animator is based on keyframe animation — a technique that allows you to define specific points in an animated sequence where filter parameters change their values. These points, known as keyframes, mark the start and end of a transition or movement. For example, if an object is to move from one side of the screen to the other, you can set a keyframe at the object's starting position and another at its endpoint — and the software interpolates the frames in between.
Generate your first animation step by step
Here is a brief guide on creating your first animation:
- Prepare a filter you want animated. With Filter Forge, you can download filters from our online filter library or create a filter yourself in Filter Editor. If you don't have Filter Forge installed, you can copy the filter from a different computer with Filter Forge. Animator doesn't require Filter Forge to operate.
- Install Animator from our website and run it from the Windows Start menu.
- If you have a specific filter to animate, click "Import a single filter". If you want all your local Filter Forge filters to be available for animation, click "Import all filters from Filter Forge".
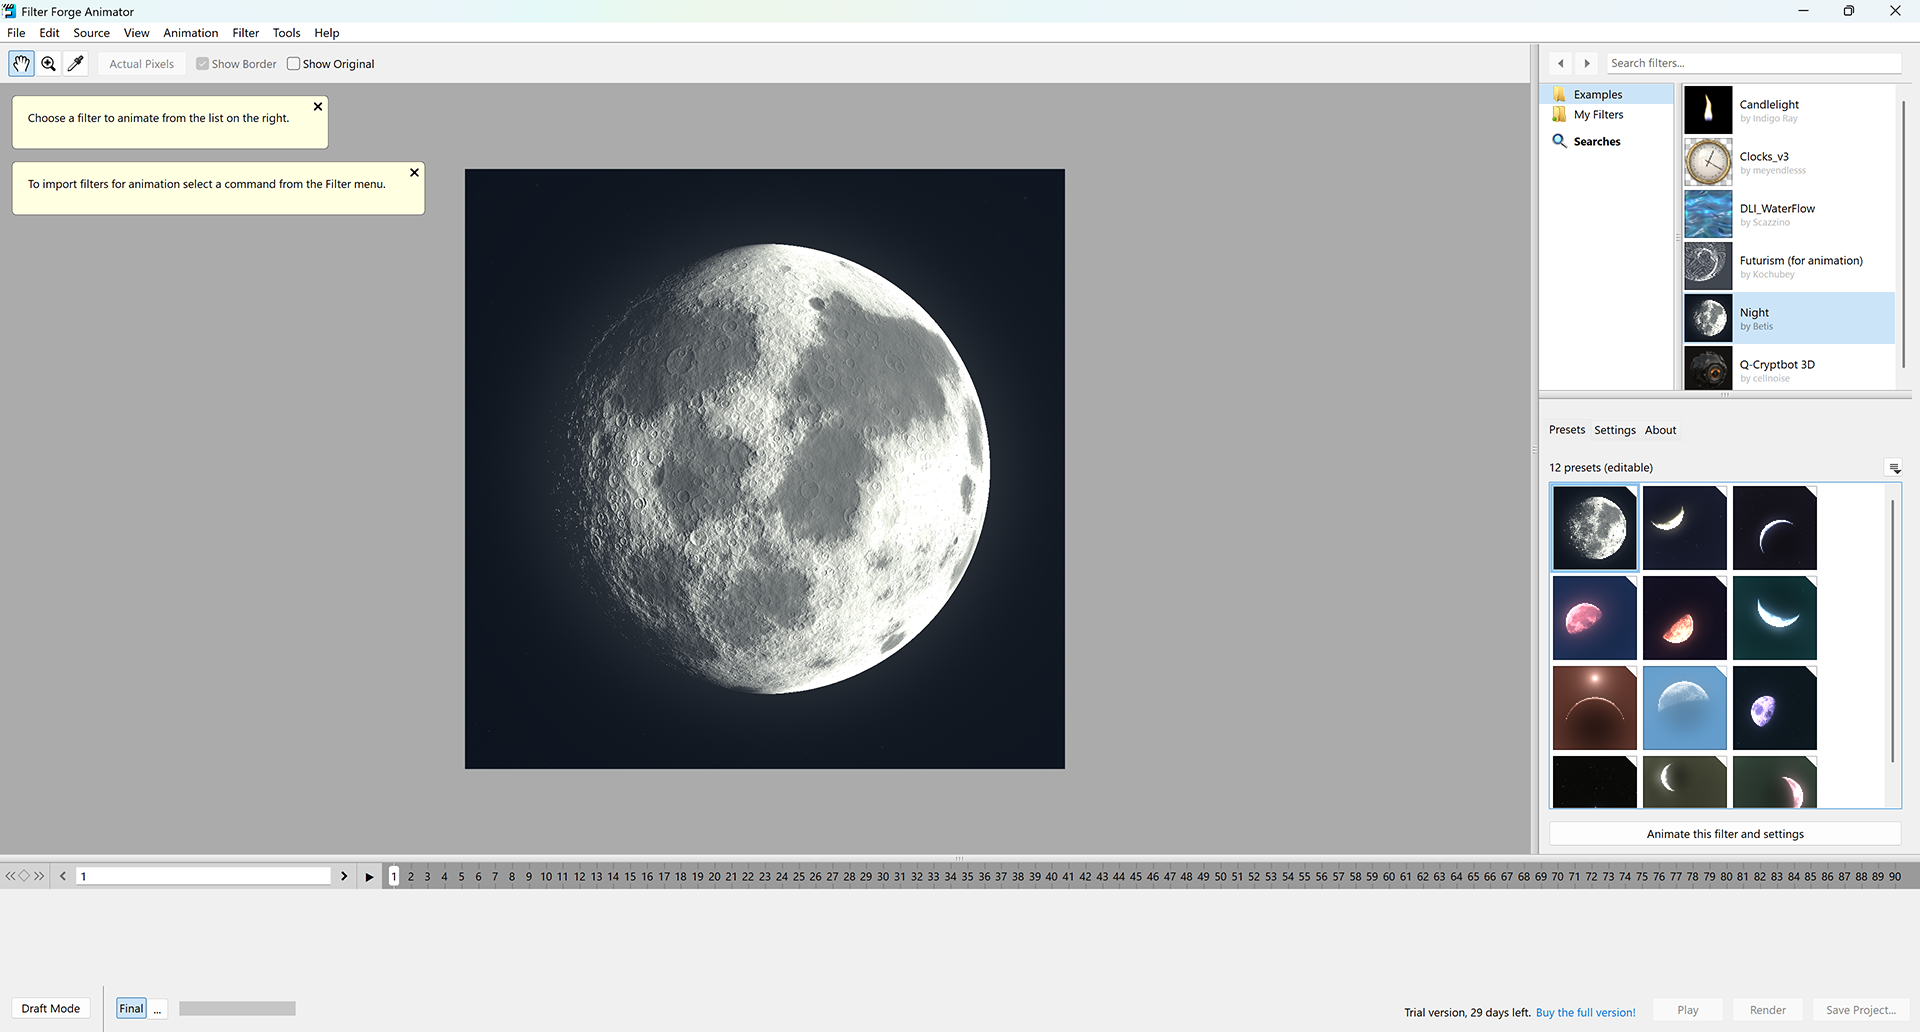
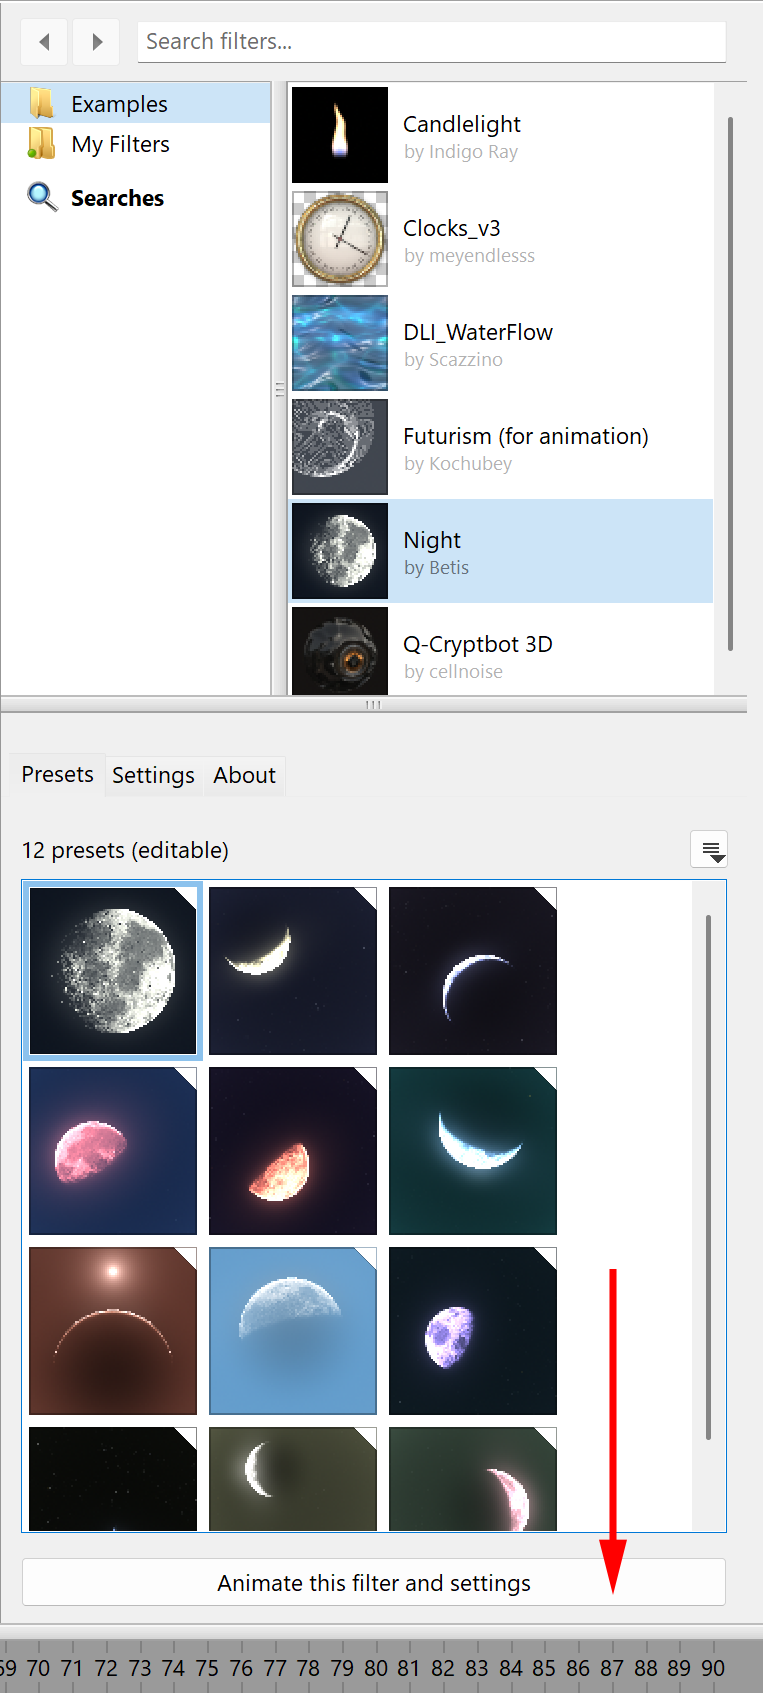
- All filters available for animation are listed on the right. Choose your filter, the required preset and tweak the parameter values if needed. This tutorial uses the Night filter that comes installed with Animator.
- To change the default frame count and frequency, click the 'Edit' button in the Animation Settings area. For the purpose of this tutorial, change the frame count to 100.
- Click the "Select this filter and preset" button to start animation with the current settings.
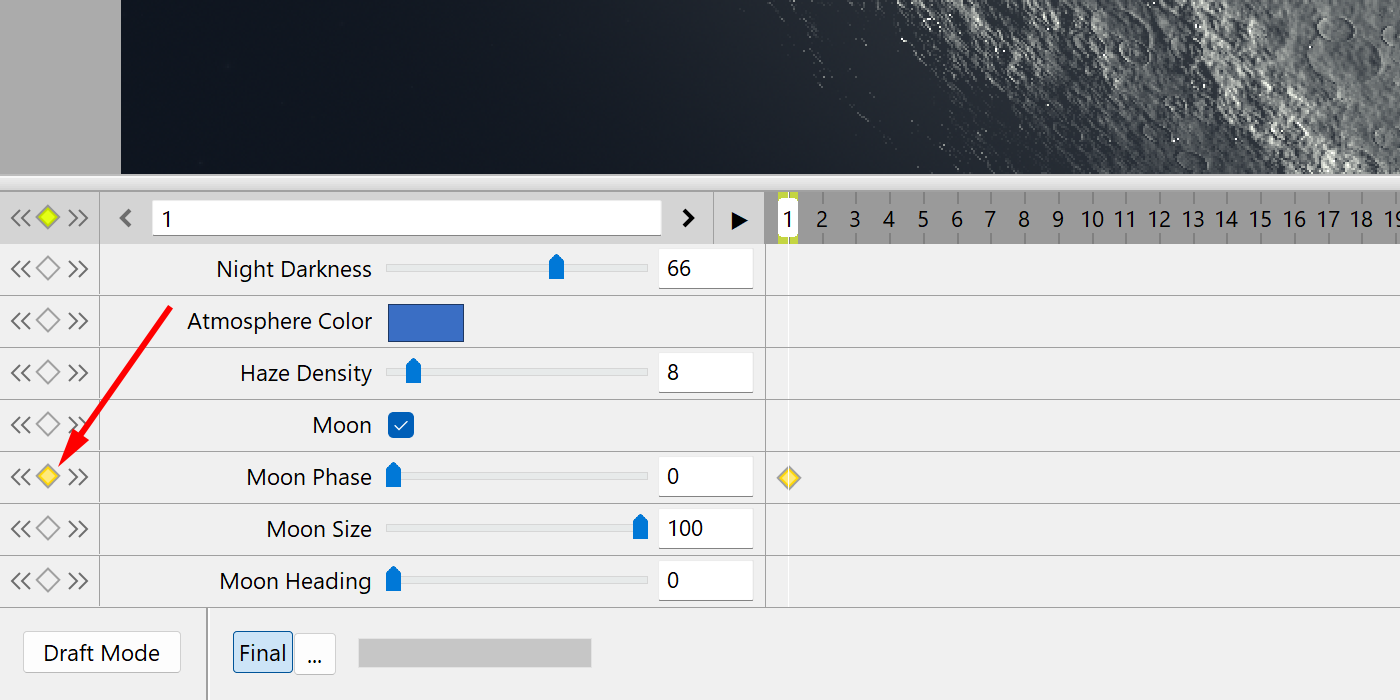
- The timeline at the bottom will turn on and become populated with the controls from the selected filter. Before you create any keyframes, all frames in your animation will have the same parameter values.
- The Night filter in this tutorial has the Moon Phase parameter that changes the image from a full moon to a crescent to a new moon. We'll be creating a 100-frame animation that will start as a full moon, then wane to a new moon and wax back to a full moon. The first frame will have Moon Phase set to 0 (equal to a full moon), the 50th frame will have Moon Phase set to 100 (new moon), and the 100th frame again to 0 (full moon). The animation will have three keyframes, and the program will calculate the rest automatically.
- Navigate to the first frame by clicking the playhead on the timeline or by typing "1" in the input field to the left of the timeline.
- Set up the first keyframe by clicking the rhombus button to the left of the Moon Phase parameter. This parameter becomes keyed which is reflected by a mark on the timeline.
- Navigate to the 50th frame. Set up a new keyframe and change the Moon Phase parameter value to 100.
- Navigate to the last 100th frame and set up a third keyframe with the parameter value of 0.
- Note that interpolation areas on the timeline now display connection lines that represent interpolation between the 1st, the 50th, and the 100th frames. You can now navigate to any in-between frame and preview the parameter value calculated for that frame.
- The animation is complete! Select File > Render... from the main program menu to render all frames as an image sequence or as a video file.

