| L.Adair | ||
| Posted: August 29, 2016 2:38 pm | ||
| L.Adair |
A Short Explanation of Lavish Lace Filter Controls
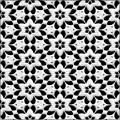
Lavish Lace is capable of creating a wide variety of patterns, in part because it utilizes all seven shapes of the Kaleidoscope component. (JLE Bridal Lace uses only the Hexagon shape to control the pattern.) In fact, Lavish Lace uses all the inputs of the Kaleidoscope component: Pattern Style: Selects the "Mode" or shape. (Square, Triangle 1, Triangle 2, Rhomb 1, Rhomb 2, Rhomb 3, and Hexagon.) Pattern Variation 1: Controls the H Offset. Pattern Variation 2: Controls the V Offset. Mesh Scale: Controls the number of pattern repeats, up to 5. (The higher the number, the smaller the pattern.) Mesh Variation: Controls the size of the medallion, (the central shape,) and fills in the space between medallions with additional mesh. Mesh Shift affects an earlier process in the filter, which uses a Tile component. It shifts the rows from a square pattern to a diagonal pattern. While the effect to the pattern is not subtle, it won't force the medallions to line up square or diagonally. With so much control over pattern creation, it is possible to create patterns that don't work well as a lace fabric, which wouldn't have any "floating" elements. You can correct that with Thread Thickness. Thread Thickness will make the overall pattern more dense when you increase it, usually connecting any "floaters," or make the overall pattern more delicate when you decrease it. Thread Variation, Thread Detail and Thread Roughness all vary the surface of the pattern by controlling different elements of the noise input. All three controls create subtle differences in the surface. I like to start with them all set to the maximum, create my pattern, and then adjust each of them to find the effect that fits my needs. Thread Color is, obviously, the color of the thread. However, you can also use an image input. Using a distinct image with a dense pattern, such as the preset uses, you can create a tapestry-like effect. Using a subtle seamless off-white grunge image can produce an "aged" appearance to the lace, (and why I set the input to take images.) Thread Brightness will lighten the Thread Color. If you are using an image, for example, you can increase the brightness to get a more subtle image effect. (The preset uses Thread Brightness at 50%.) The reason for adding this control was specifically to lighten black thread enough to "see" the "threads." However, you can get some interesting effects by lightening any color thread, (except white, of course.) Background Color is used by the Background Options control when not using a transparent background. Background Options is a Switch with 12 inputs. Here is a list of what you get when you select one of the Background Options: Black White Bkgd Color Bkgd Color Noise Variation Bkgd Color Noise Variation Bkgd Color Noise Variation Gray Noise Variation Gray Noise Variation Thread Color Inverted Thread Color Inverted Noise Variation Thread Color Inverted Noise Variation Thread Color Inverted Noise Variation Note: Using black and/or white for Thread Color and/or Bkgd Color will result in fewer Bkgd Variations Transparent Bkgd removes the background fr om the pattern when selected. This covers all the current controls. I hope this extra bit of information will assist you getting the look you're after. Enjoy, L'Adair |
|
| Posted: August 29, 2016 5:43 pm | ||
| L.Adair |
As the saying goes, a picture is worth a thousand words. Here are some 3D renders, (using Daz Studio,) with the same figure and dress but different lace patterns. For those of you doing 3D, detailed information follows the images.
The first two images are the front and back, using the same lace pattern: 
(You can view the full-size image in my DAZ gallery here.) 
(You can view the full-size image in my DAZ gallery here.) The next two images each use a different lace pattern: 
(You can view the full-size image in my DAZ gallery here.) 
(You can view the full-size image in my DAZ gallery here.) ***** Now, for those of you who are curious how I applied the lace to the dress, here's what I did. (Using Daz Studio 4.8 and Iray.) First, in Filter Forge, I started a New Image at 2048 pixels square with a transparent background. I applied a preset, made sure Transparent Bkgd was not checked and set Background Options to 1 (black) as I was working with white thread. (The last step before saving the images is to make the background transparent.) After that, I just played with the various controls until I liked the pattern. Once I was happy with the pattern, I saved the image. Then I went to the Main Menu and sel ected Filter and Render Maps. (I have the Pro version of FF.) I saved the Normal map and Alpha map. With the lace images complete, I opened Daz Studio. I put Bella Donna Dress for G3F on Kalea 7. I didn't bother with shoes, as her feet aren't seen. She's wearing Oleander Hair for G3F, (which came with the Kalea 7 Pro bundle.) The pose is from Sultry Poses and Props. The Bella Donna Dress has matching poses. I had some issues getting the dress pose to work correctly on the figure. What worked best for me was not fitting the dress ("Fit-to") to Kalea until after I applied the pose to the dress. Creating the Lace Overdress was really easy. I selected the dress and then created a "New Geoshell." The geoshell uses 3Delight shaders by default, so I selected the geoshell in the Scenes tab and the Surfaces tab and applied the Iray Uber Shader. Then I reset Cutout Opacity to 1 in the geoshell Surface parameters. Bella Donna Dress has both 3Delight and Iray material settings. I selected one of the Iray material settings, and then with the dress selected in both the Scenes tab and the Surfaces tab, I applied a fabric shader. (I used a satin shader freebie fr om Mec4D, but any solid color fabric shader should work.) I also applied this shader to the Trim material zone of the geoshell. (Or in one case, a white satin to match the lace and contrast with the red satin underneath.) Finally, I selected the other three material zones of the geoshell. I used the lace image for both the Base Color and Base Bump. (That worked because the thread was white. If you want to do this with a colored thread, I'd recommend saving both a colored thread and white thread version.) I used the normal map for the Base Normal and the alpha map for Cutout Opacity. That's all there is to it. Very simple, really, once you're familiar with both programs. |
|
| Posted: August 31, 2016 6:21 pm | ||
| L.Adair |
Here's another render I did to showcase the lace. This ended up a complete scene because the white lace, where the tablecloth hung down from the table, just didn't stand out on a white background. I added the apartment set, then the table looked out of place by itself. So I added chairs, then dishes, and finally the flowers.

(You can view the full-size image in my DAZ gallery here.) |
|
| Posted: September 1, 2016 1:07 am | ||
Join Our Community!
Filter Forge has a thriving, vibrant, knowledgeable user community. Feel free to join us and have fun!
33,820 Registered Users
+14 new in 30 days!
153,732 Posts
+17 new in 30 days!
15,381 Topics
+5 new in 30 days!
Online Users Last minute:
5 unregistered users.
Recent Forum Posts:
- Guide on how to use texture maps PBR export with Filter Forge for 3D by SpaceRay
June 24, 2026 - PBR work flow...? by SpaceRay
June 24, 2026 - Chaos Fields by Ramlyn
June 21, 2026 - Unleashing creativity art with the help of filter forge 11 by EAdams
June 14, 2026 - FF 11 and FF 12 Studio animations that could maybe be done I think by CFandM
June 8, 2026 - BB - BubbleBlocks by Ramlyn by Ramlyn
June 2, 2026 - Dragon Distort II by Wolfgang Halder by Wolfgang Halder
June 1, 2026 - Multi Refraction by aaron Harris by SpaceRay
June 1, 2026 - Flashing Messages 3x6 by Rachel Duim by SpaceRay
May 28, 2026 - New awesome TEXT component FF 14 - How to get the most of it? by SpaceRay
May 28, 2026 - Just dropping in to say by Rachel Duim
May 24, 2026 - Veggie Rock by Vanblam by dactilardesign
May 22, 2026