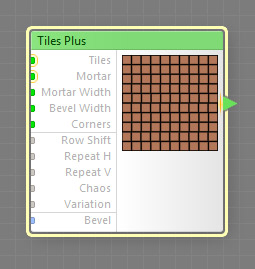
Tiles Plus is an advanced version of the Tiles component. In addition to the functionality of the regular Tiles component, Tiles Plus provides the ability to customize the appearance of individual tiles via slave components that expose various internal parameters of the tile (such as random numbers unique for this tile, or the coordinates of the tile center and corners) to the subtree that defines tile appearance.
The output of slave components of Tiles Plus changes depending on the tile currently being rendered. This means that you can use them in the subtree of the Tiles input to vary any number of inputs in that subtree for each individual tile. For more information, see the section 'Using Slave Components' below. For general information about slave components, see Slave components.
Since individual tile customization is now possible via slave components, some inputs that are present in the regular Tiles component were removed from Tiles Plus as unnecessary. As a side effect, the removal of inputs related to HLS-based color randomization enabled the support for HDR colors on inputs and output of Tiles Plus. Here's the list of removed inputs:
- H Range
- L Range
- S Range
- Fill Mode
Tiles Plus is a map component, it can be located in the Patterns category on the Components Bar. This is a discrete component: any filter that uses it is automatically classed as a discrete filter. This component can output HDR colors.
This input defines the tile appearance. The appearance of each individual tile can be customized via slave components connected to the subtree of this input. This input can accept HDR colors.
Tiles is the only input in the Tiles Plus component that can accept connections from the Tiles Plus slave components. Connecting them to any other inputs will have no effect. For more information, see the section 'Using Slave Components' below.
Defines the color of the spacing between tiles. To set the mortar color for various image areas separately, connect a map component to this input. This input can accept HDR colors.
Mortar Width: Map Input
Sets the width of the spacing between the tiles. The actual spacing between a tile and its neighbors is also influenced by the Chaos parameter. Since Mortar Width is a map input, its value can be controlled separately for different image areas by connecting a map component to this input.
Bevel Width: Map Input
Defines the width of the tile slopes. The less the bevel width, the steeper and narrower the tile slopes. When Bevel Width is zero, the slopes disappear completely. When Bevel Width is 100, the slopes occupy the entire tile area, leaving no flat region in the middle. Since Bevel Width is a map input, its value can be controlled separately for different image areas by connecting a map component to this input.
Corners: Map Input
Defines how round the corners of the tiles are. With Corners set to 0, the corners of the tiles will be sharp, with no rounding. With Corners set to 100, the corners will be fully rounded. Since Corners is a map input, its value can be controlled separately for different image areas by connecting a map component to this input.
When turned on, the rows in even positions are shifted against the rows in odd positions by half the tile width. The actual amount of row shift is affected by the Chaos parameter.
Specifies how many times the pattern is repeated horizontally. The actual number of repetitions within the output image is also affected by the global parameter Size and the image width. For example, when Repeat is 3, Size is 600 pixels and the image width is 1200 pixels, the pattern will be repeated 6 times within the image width.
Specifies how many times the pattern is repeated vertically. The actual number of repetitions within the output image is also affected by the global parameter Size and the image height. For example, when Repeat is 5, Size is 500 pixels and the image height is 1000 pixels, the pattern will be repeated 10 times within the image height.
Makes the tile pattern more realistic by introducing imperfection. Chaos disarranges the pattern by randomly shifting the tile rows, and, if Mortar Width allows, the tiles themselves. Chaos of 0 means perfect order, larger values increase the disorder. The exact placement of each tile is determined randomly.
Variation, technically known as random seed, affects the random aspects of the component which cannot be controlled directly: it randomizes the row shift and tile disorder when Chaos is non-zero. The randomization is also affected by the global Variation value. For more information, see How Variation Works.
Bevel: Curve Input
Defines the bevel profile of each tile (the transition between the tile color and the mortar color). When Bevel Width is 0, this parameter has no effect. Three predefined bevel profiles are available: Linear, Smooth, and Contours. To customize the bevel profile, connect a curve component to this input.
For best results, the curve connected to the Bevel input should start at 0 and end at 100% – curves like Linear, Step, Gain and Stairs are perfect choices, while curves like Noise or Wave will require additional adjustments or modifications (for example, you can use the Fade component to force the start and end of any curve into desired positions).
Slave Components
These buttons create slave components linked to the currently selected Tiles Plus component. You can have multiple copies of each slave component.
Add Randomizer
Adds a Randomizer slave component that outputs a normalized random value (converted to color) that is unique for each tile. You can create multiple copies of Randomizer, so if you need multiple random values to build or modify the tile subtree, you can use multiple Randomizers with different Variation settings (i.e. random seeds).
Add Cell Center X
Adds a Cell Center X slave component that outputs the X coordinate of the grid cell in which the current tile is located.
Add Cell Center Y
Adds a Cell Center Y slave component that outputs the Y coordinate of the grid cell in which the current tile is located.
Add Cell Left
Adds a Cell Left slave component that outputs the X coordinate of the left border of the grid cell in which the current tile is located.
Add Cell Top
Adds a Cell Top slave component that outputs the Y coordinate of the top border of the grid cell in which the current tile is located.
Add Cell Right
Adds a Cell Right slave component that outputs the X coordinate of the right border of the grid cell in which the current tile is located.
Add Cell Bottom
Adds a Cell Bottom slave component that outputs the Y coordinate of the bottom border of the grid cell in which the current tile is located.
Add Element Center X
Adds an Element Center X slave component that outputs the X coordinate of the center of the current tile, after all transformations, offsets and chaos have been applied.
Add Element Center Y
Adds an Element Center Y slave component that outputs the Y coordinate of the center of the current tile, after all transformations, offsets and chaos have been applied.
Add Element Left
Adds an Element Left slave component that outputs the X coordinate of the left border of the current tile, after all transformations, offsets and chaos have been applied.
Add Element Top
Adds an Element Top slave component that outputs the Y coordinate of the top border of the current tile, after all transformations, offsets and chaos have been applied.
Add Element Right
Adds an Element Right slave component that outputs the X coordinate of the right border of the current tile, after all transformations, offsets and chaos have been applied.
Add Element Bottom
Adds an Element Bottom slave component that outputs the Y coordinate of the bottom border of the current tile, after all transformations, offsets and chaos have been applied.
Using Slave Components
Slave components of Tiles Plus work properly only when the following conditions are met:
First, any slave components must be connected to the subtree of their master's Tiles input, otherwise they will have no effect. The Tiles input is the only input in the Tiles Plus component that generates element data for slaves during sampling.
And second, there must be no bitmap-based components between the slave and the Tiles input. Bitmap-based components (such as Blur or Motion Blur) kill the element data sent to slaves by their master, and thus cannot be used in slave-to-master connections.
Nesting
Like Loop or any other slave-supporting component, Tiles Plus is nestable: it can be nested within a subtree of another slave-supporting component, or have another slave-supporting component inside its Tiles subtree, or both at the same time.