This tutorial demonstrates the basic workflow of Animator — a Filter Forge addon that allows you to animate static Filter Forge filters. We'll turn this image into an MP4 video:

Install Filter Forge 14 or newer and Animator.
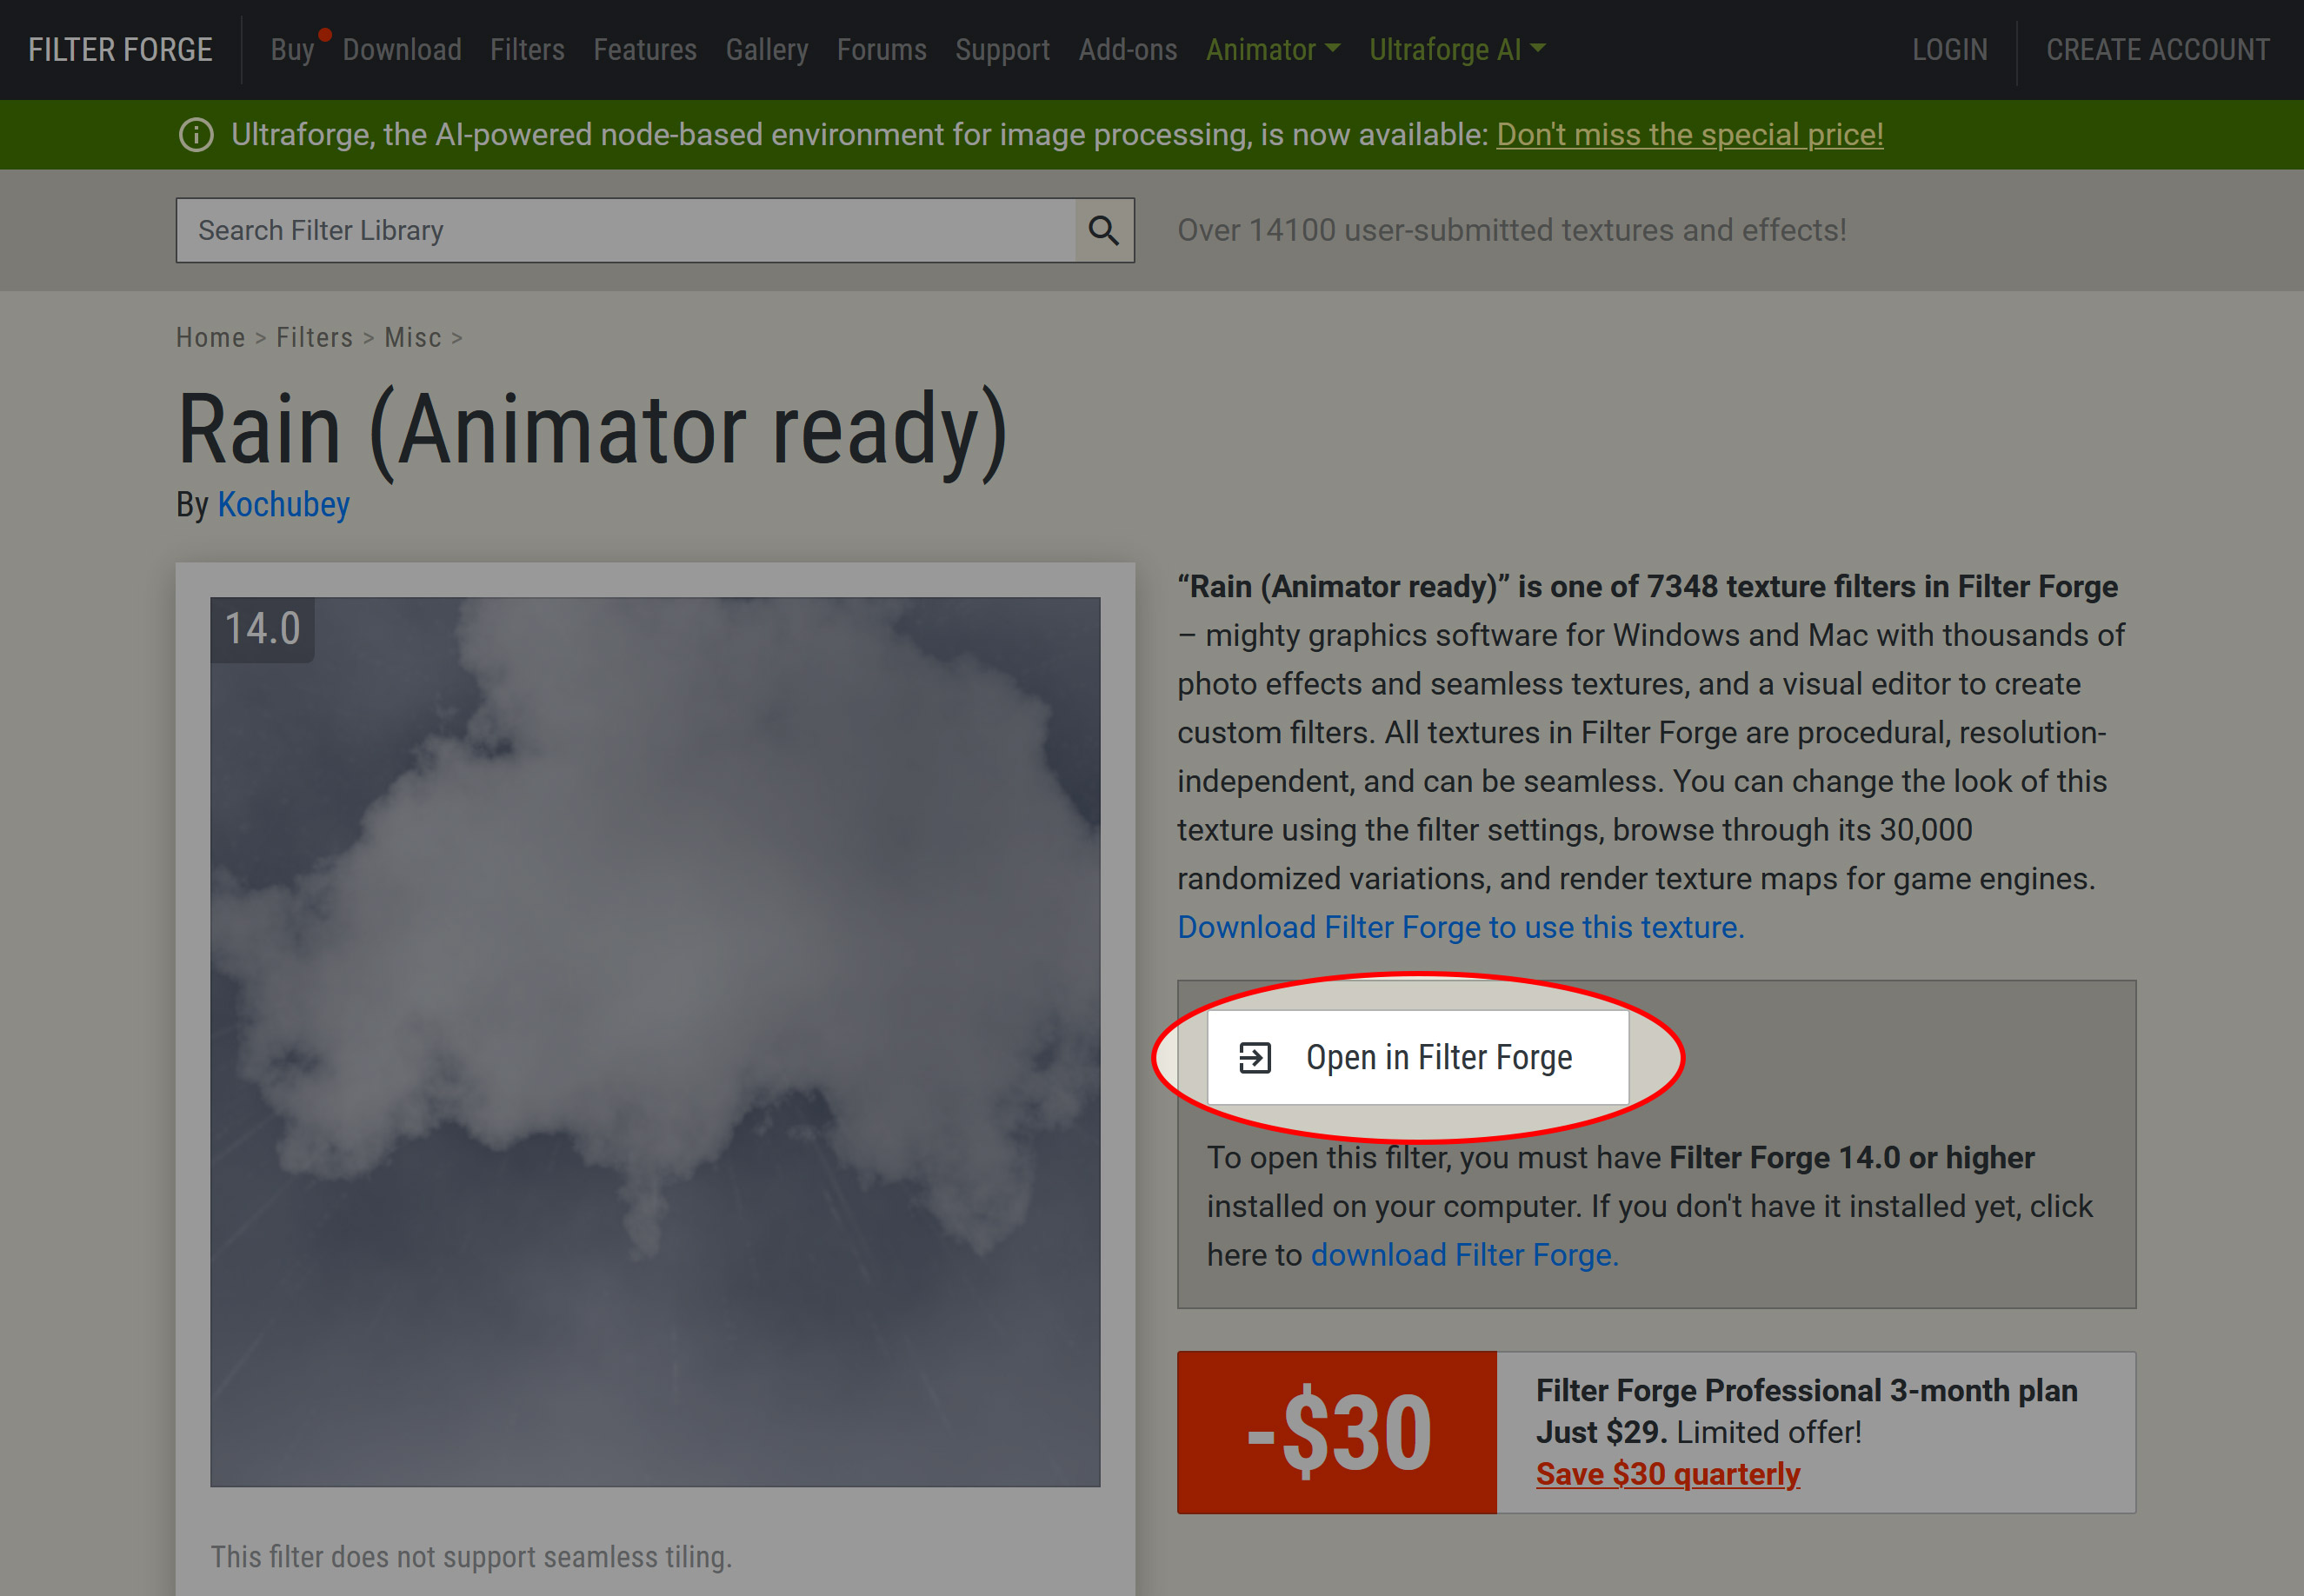
Download the filter called Rain (Animator ready): open its web page and click the Open in Filter Forge button.
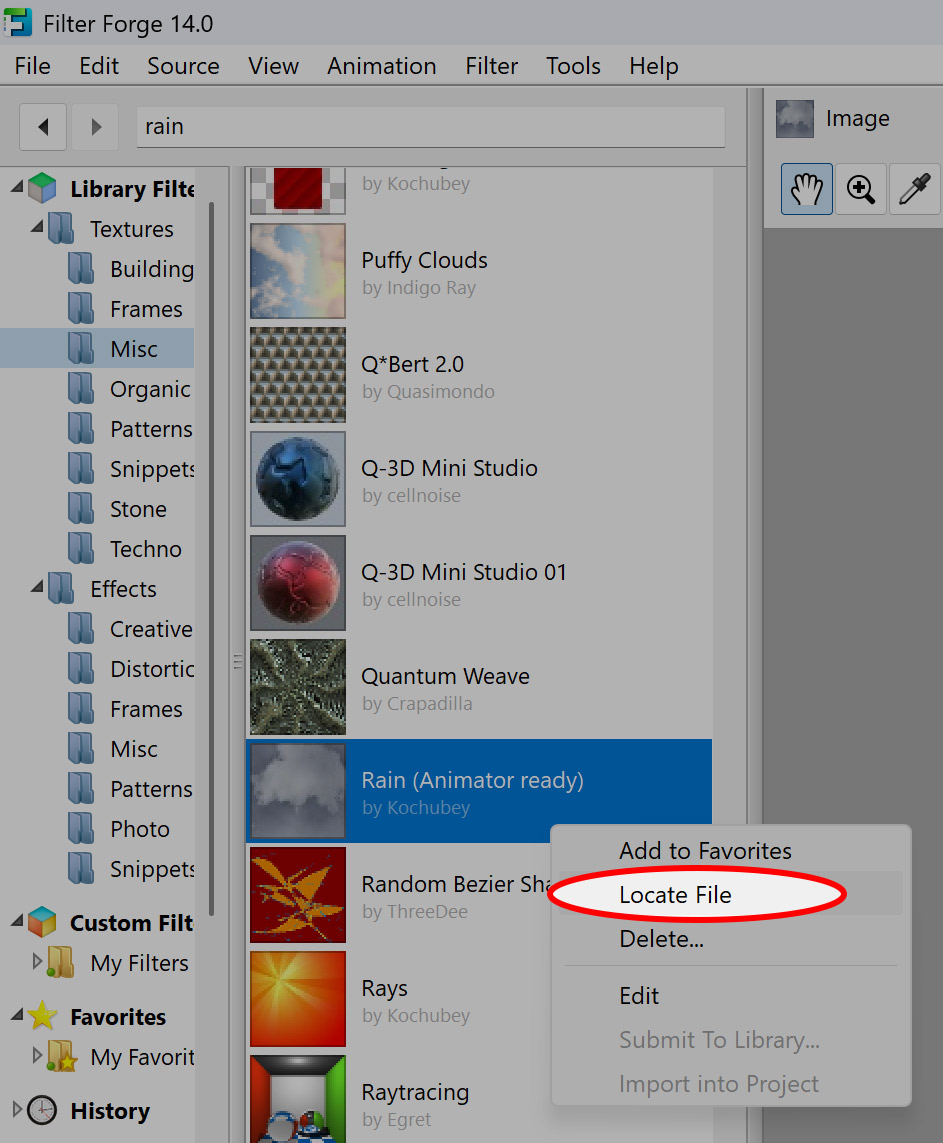
Open Filter Forge and locate the newly-added filter on the filter list in the Misc category. Right-click the filter and select Locate file from the dropdown menu:
-
An Explorer/Finder window will open, highlighting the file location. Note down the path to the filter file.
-
Run Animator, select Filter > Import a single filter... from the menu. Point it to the file path from the previous step.
-
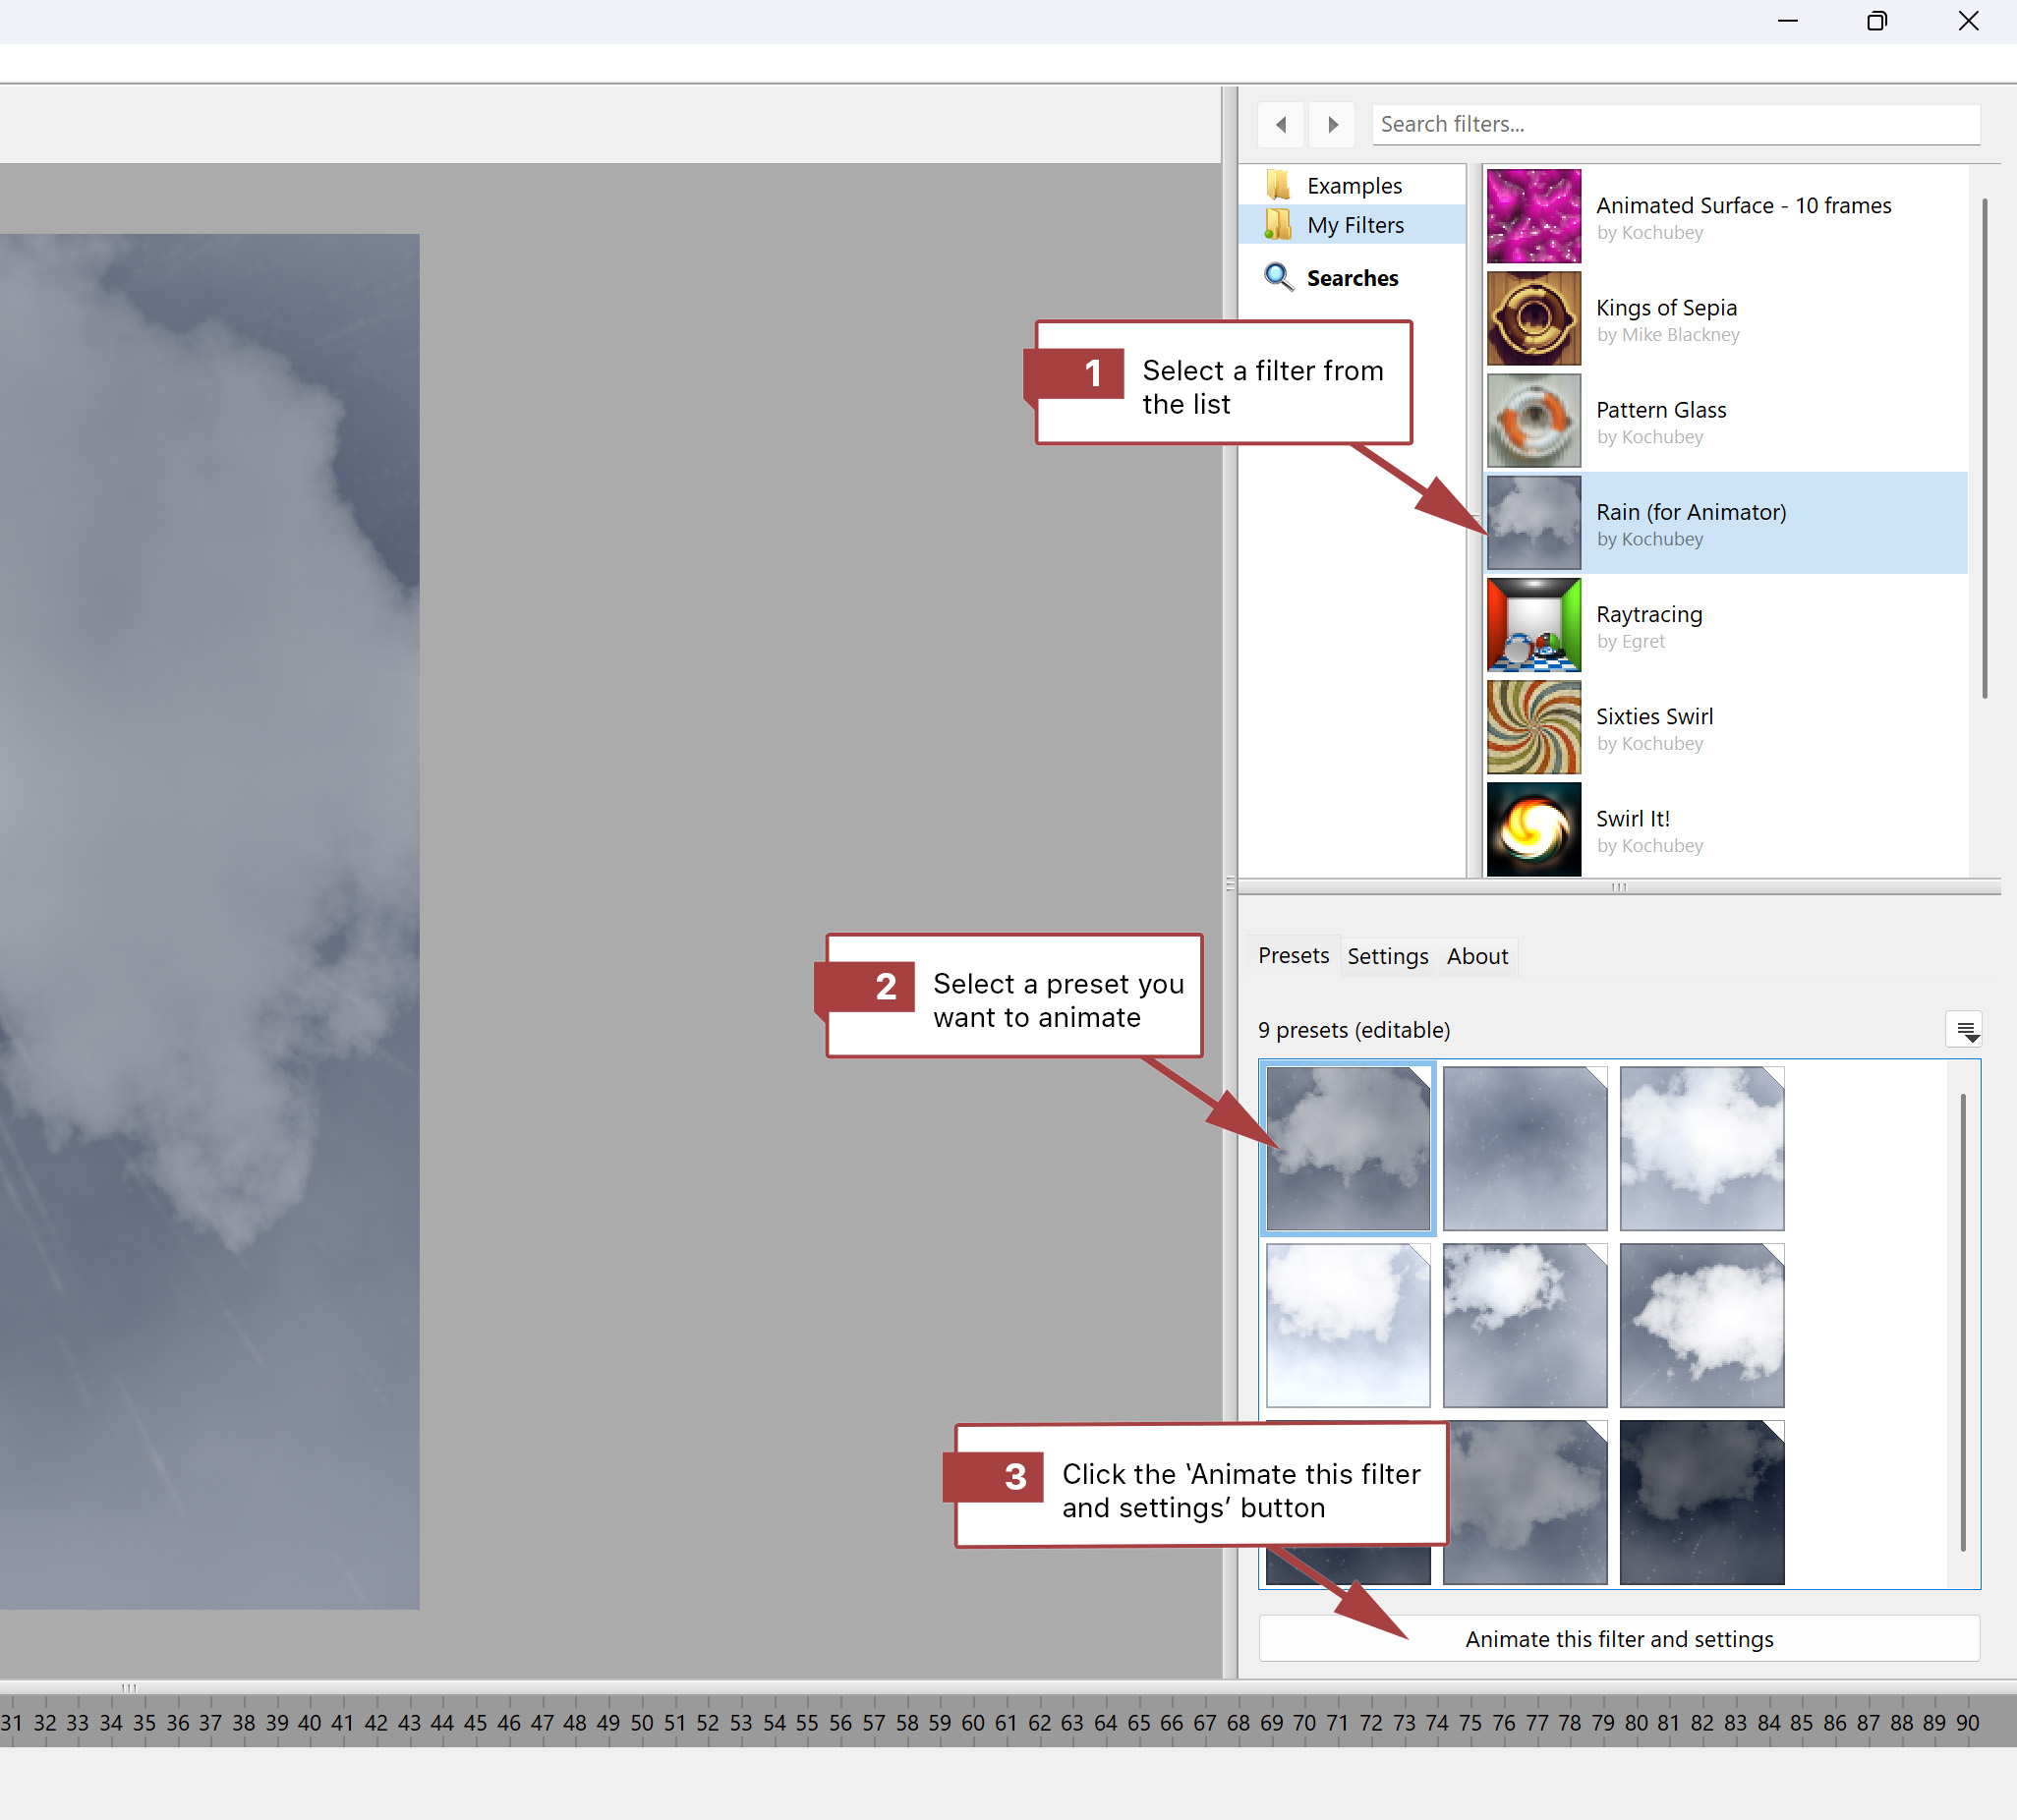
The filter is now loaded into Animator and is ready for processing. Select the Rain (Animator ready) filter from the Animator filter list, select the first preset and click the Аnimate this filter and settings button.
Note the program interface has changed: the timeline at the bottom has been activated and populated with controls from the selected filter.
-
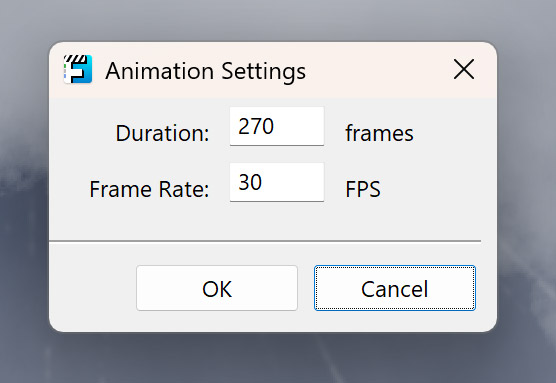
Click the Edit button in the Animation Settings section on the right. Set the settings to 270 frames and 30 FPS.
-
Find the Rain control under the timeline. Set the timeline playhead to the first frame, and create a keyframe by clicking the rhombus
 button to the left of the Rain control. The parameter value for the first frame is 1, leave it as is.
 -
Set the timeline playhead to the final 270th frame, create a keyframe, and set the parameter value to 12.
-
Repeat the previous step, creating three more keyframes for the 1st frame and three more keyframes for the 270th frame, referencing the table below.
Control Frame 1 Frame 270 Cloud Shape 0 0.5 Cloud H Position -0.31 0.1 Cloud Y Position 0 -0.07 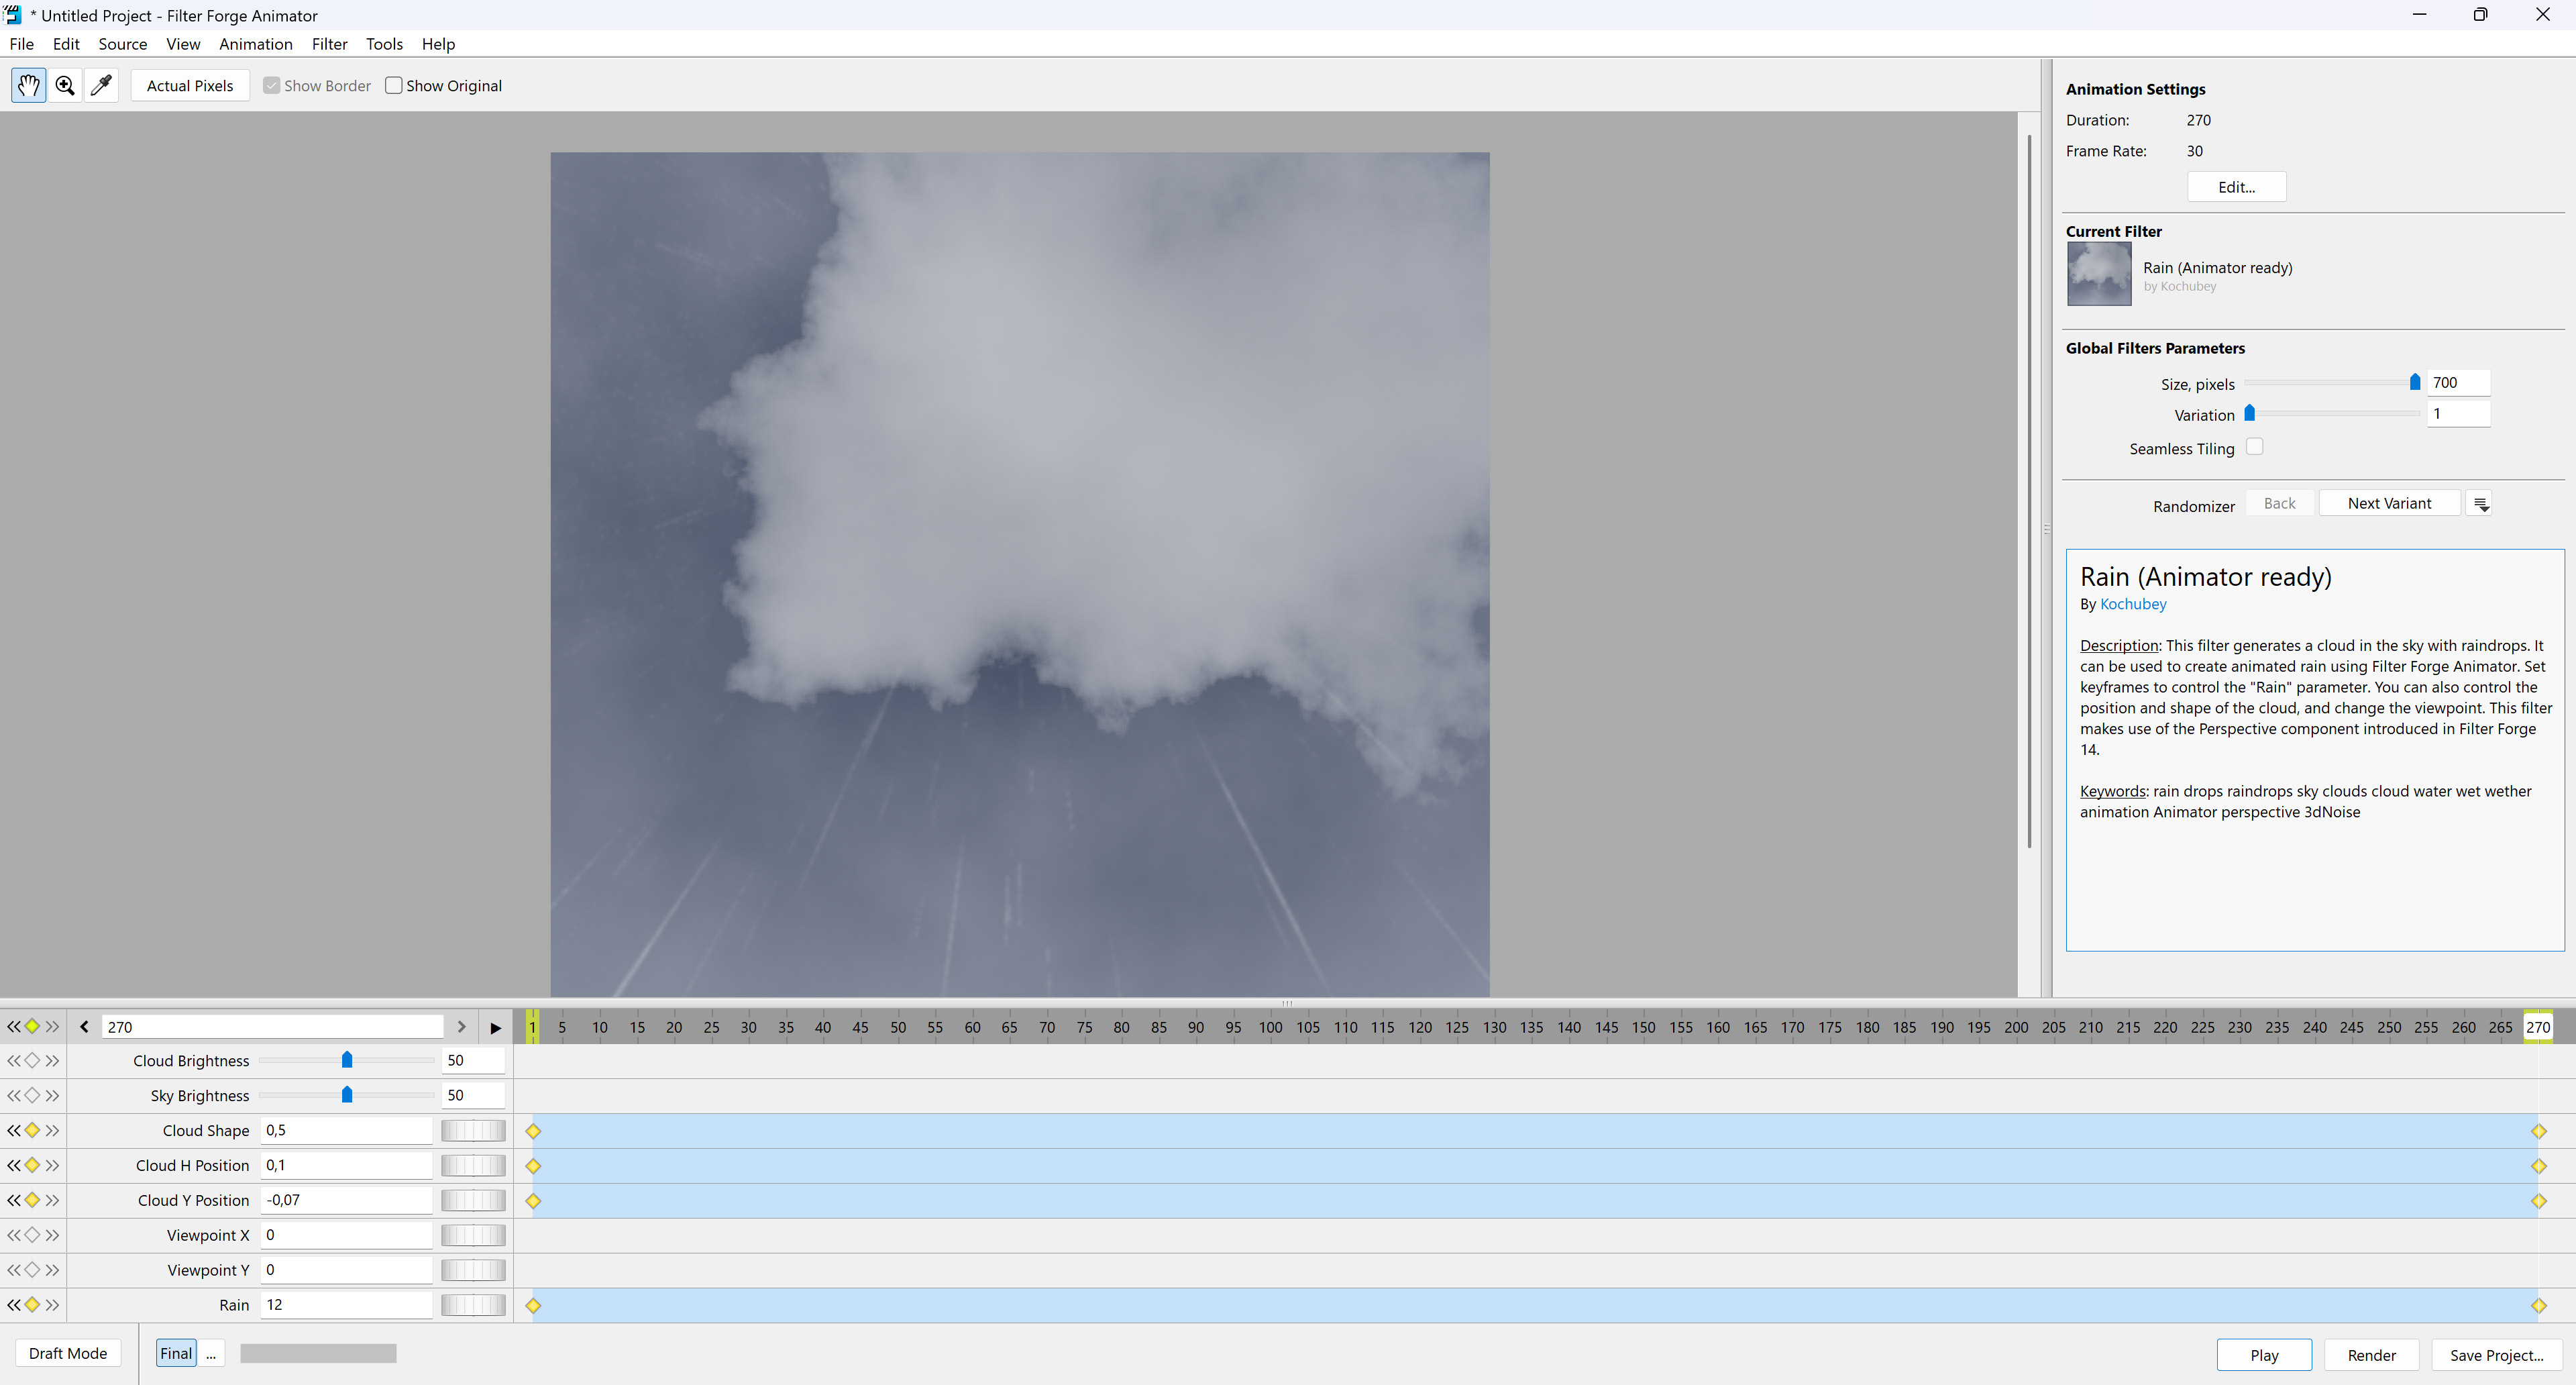
-
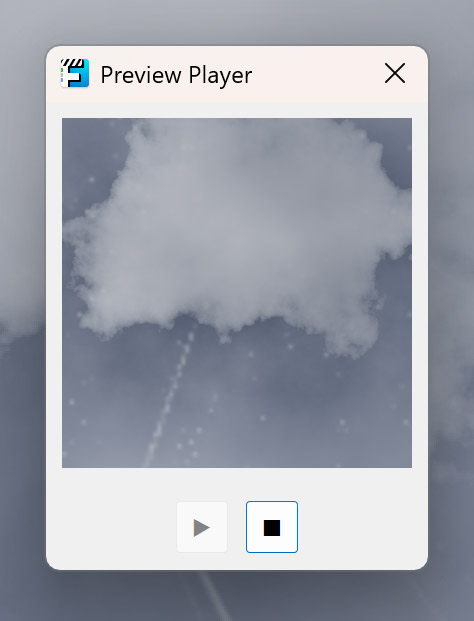
The keyframes are set — you can preview the result by clicking the Play button.
-
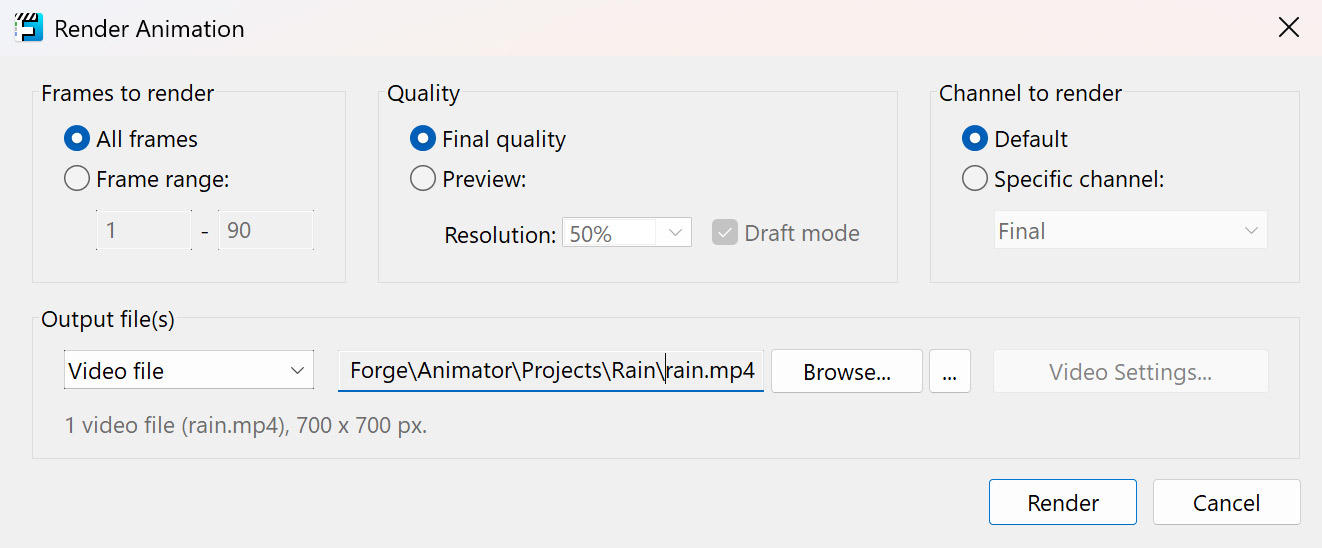
Click the Render button. Set the output to an MP4 video file and wait for the animation to render.
Here is the final result:
Tutorial by Kochubey. Sep 02, 2025.