Today you'll learn how to animate a static Filter Forge effect. You'll need a free 30-day trial version of Filter Forge 11 or a registered Filter Forge 11 Studio.
-
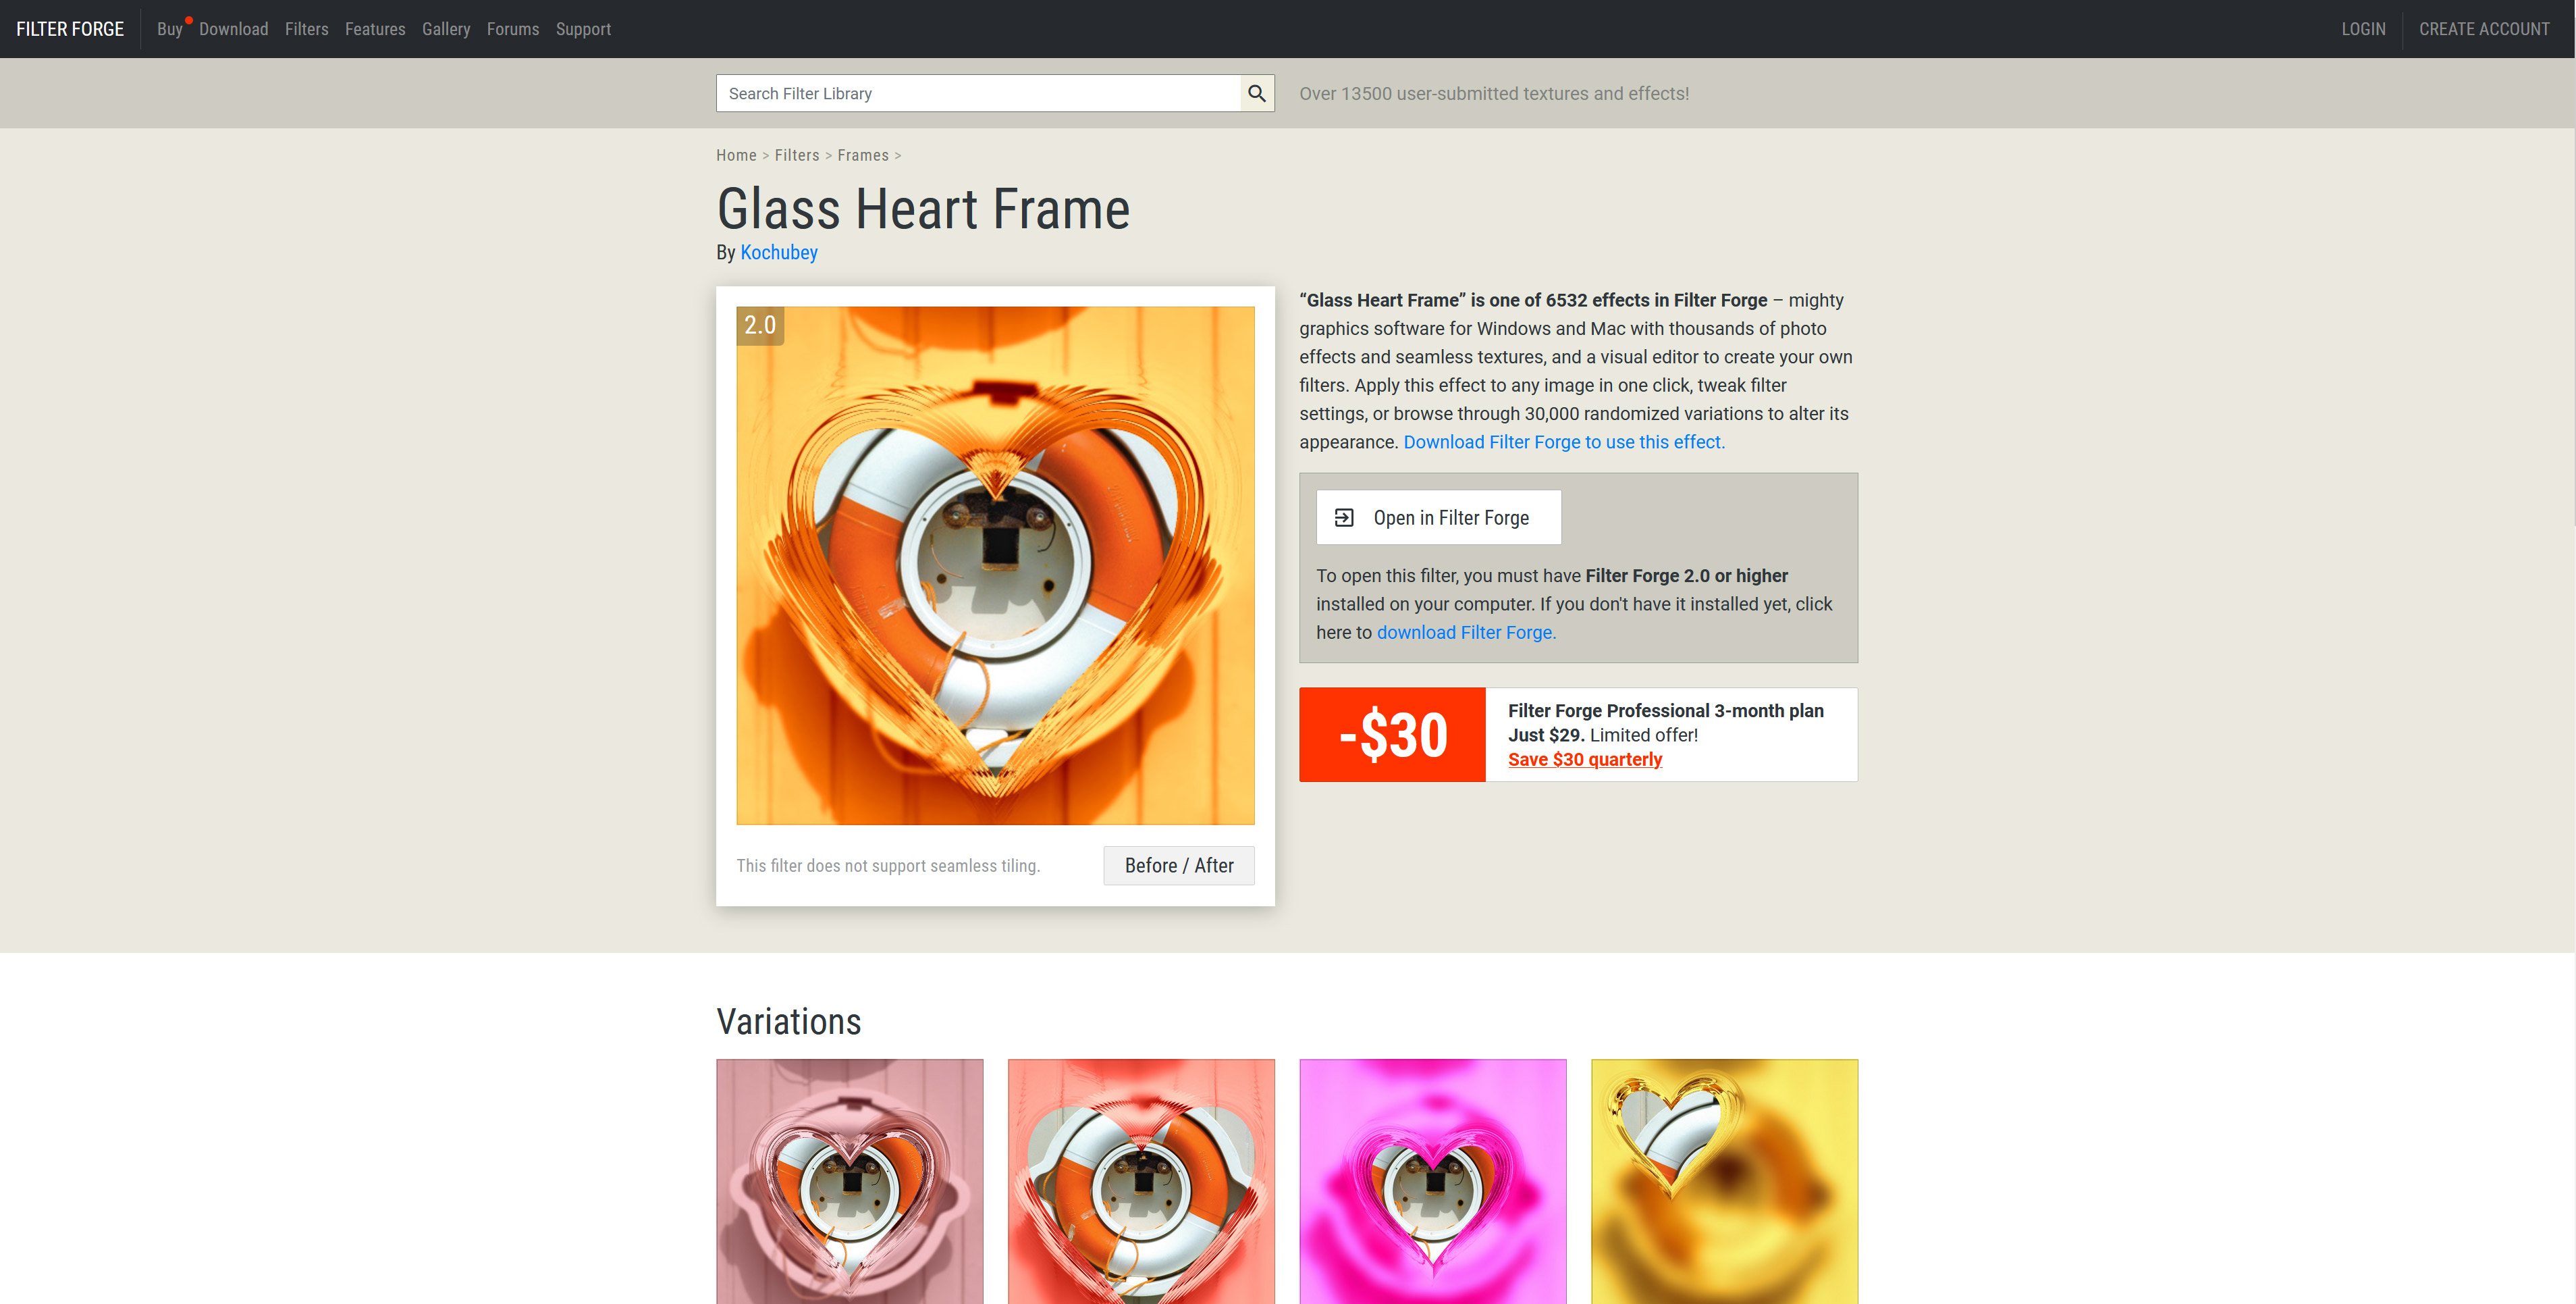
In this tutorial we’ll be animating the following heart-shaped frame:
https://www.filterforge.com/filters/9399.htmlWe'll make this frame gradually decrease in size in the course of animation.
-
Click the 'Open in Filter Forge' button to load the filter into Filter Forge. If you have used this filter previously, run Filter Forge and select Tools > Filter Updates… in the Filter Forge main menu to use the latest filter version.
-
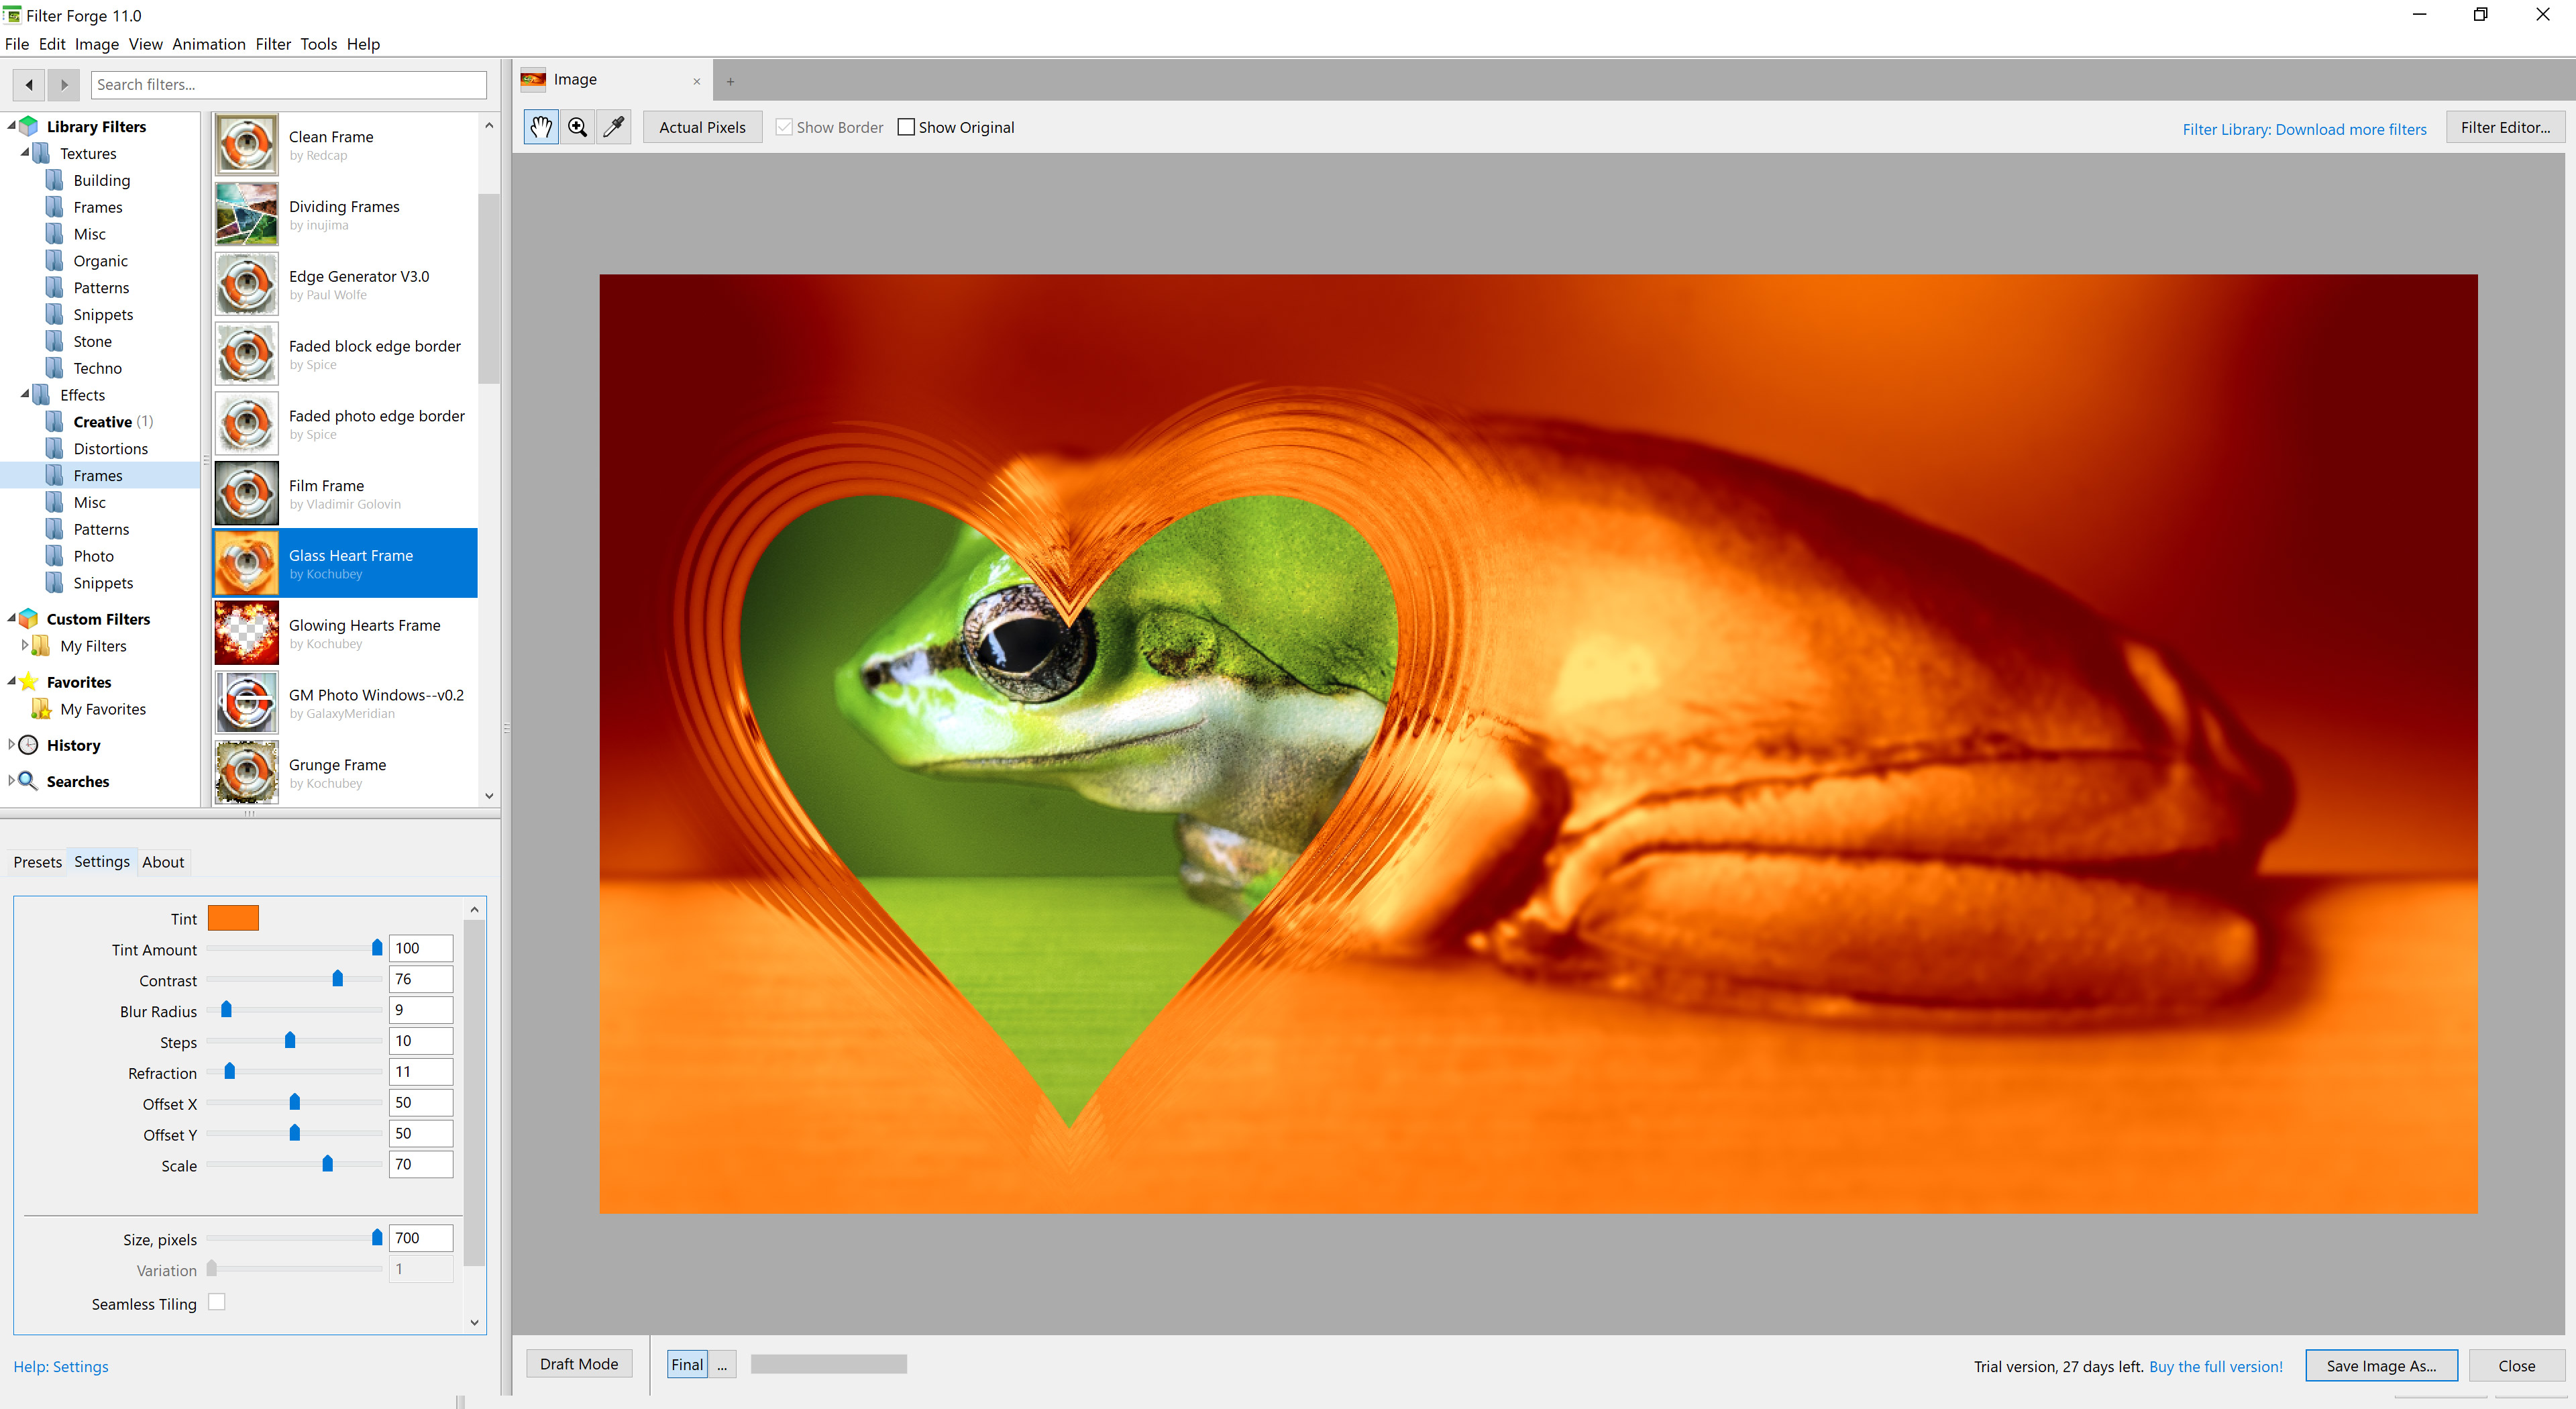
Select Image > Open… to open your source image in Filter Forge. I’ll choose this lovely frog:

-
Navigate to the Effects > Frames category and apply the Glass Heart Frame filter. The result will look like this:
-
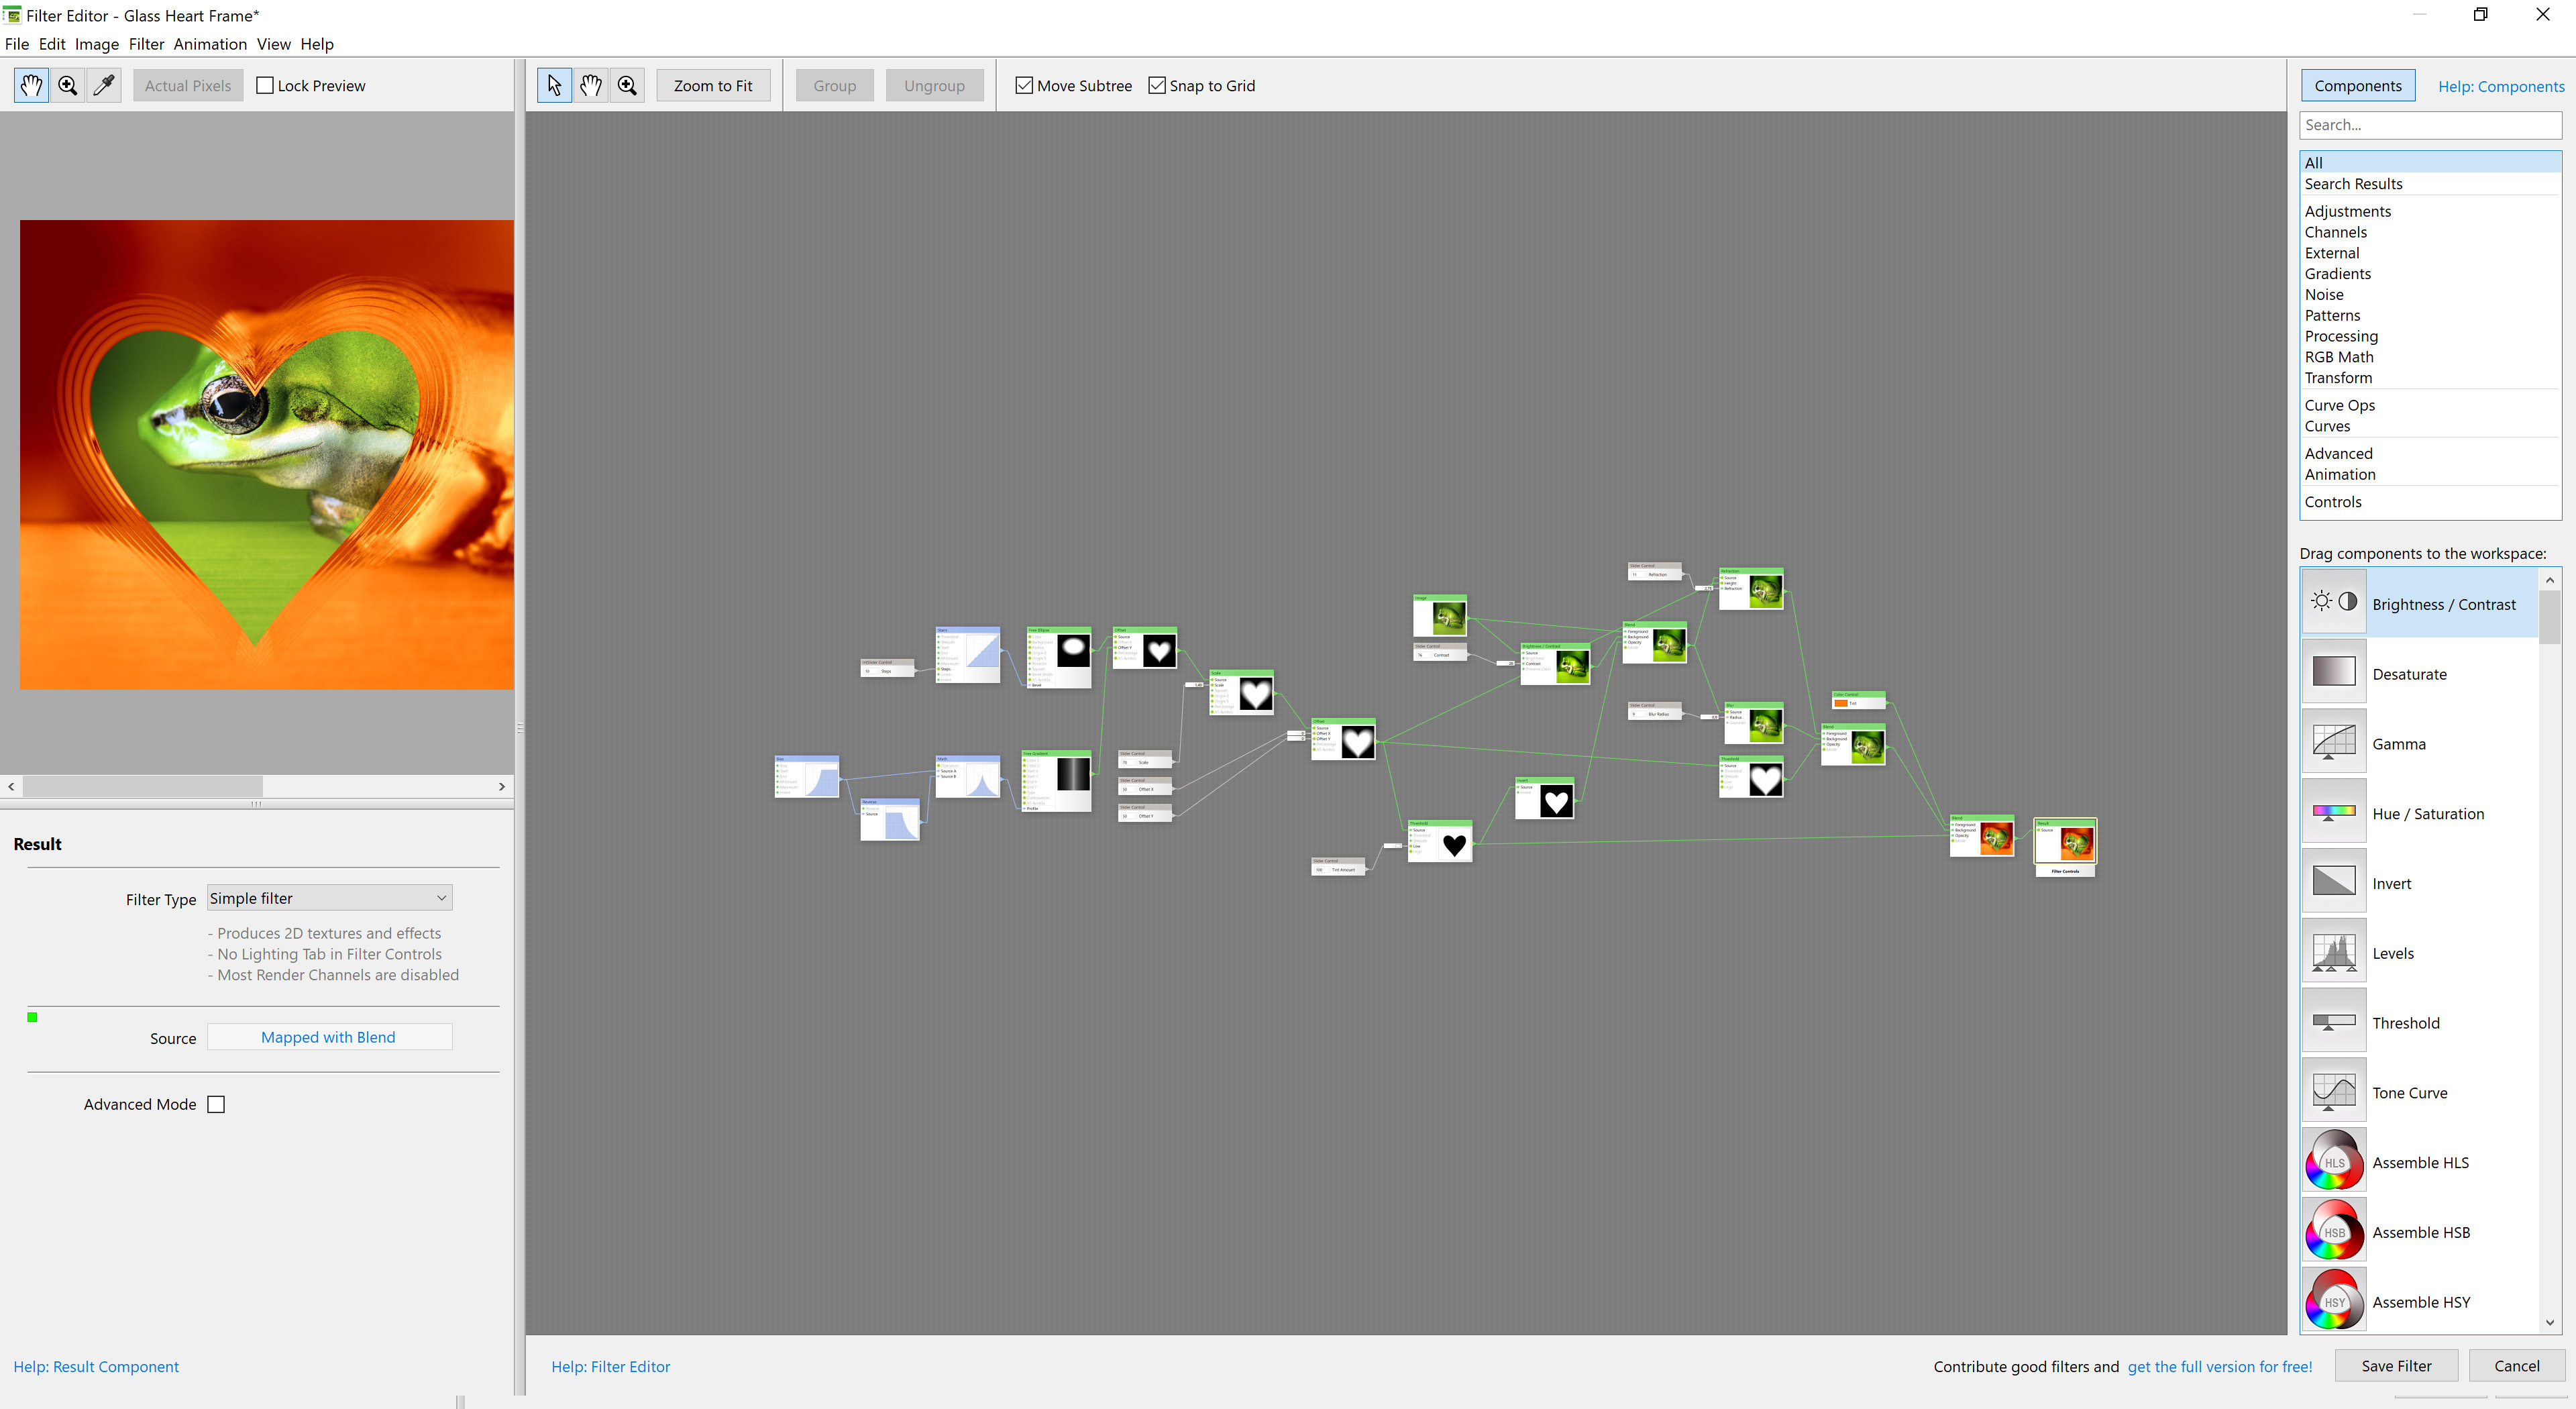
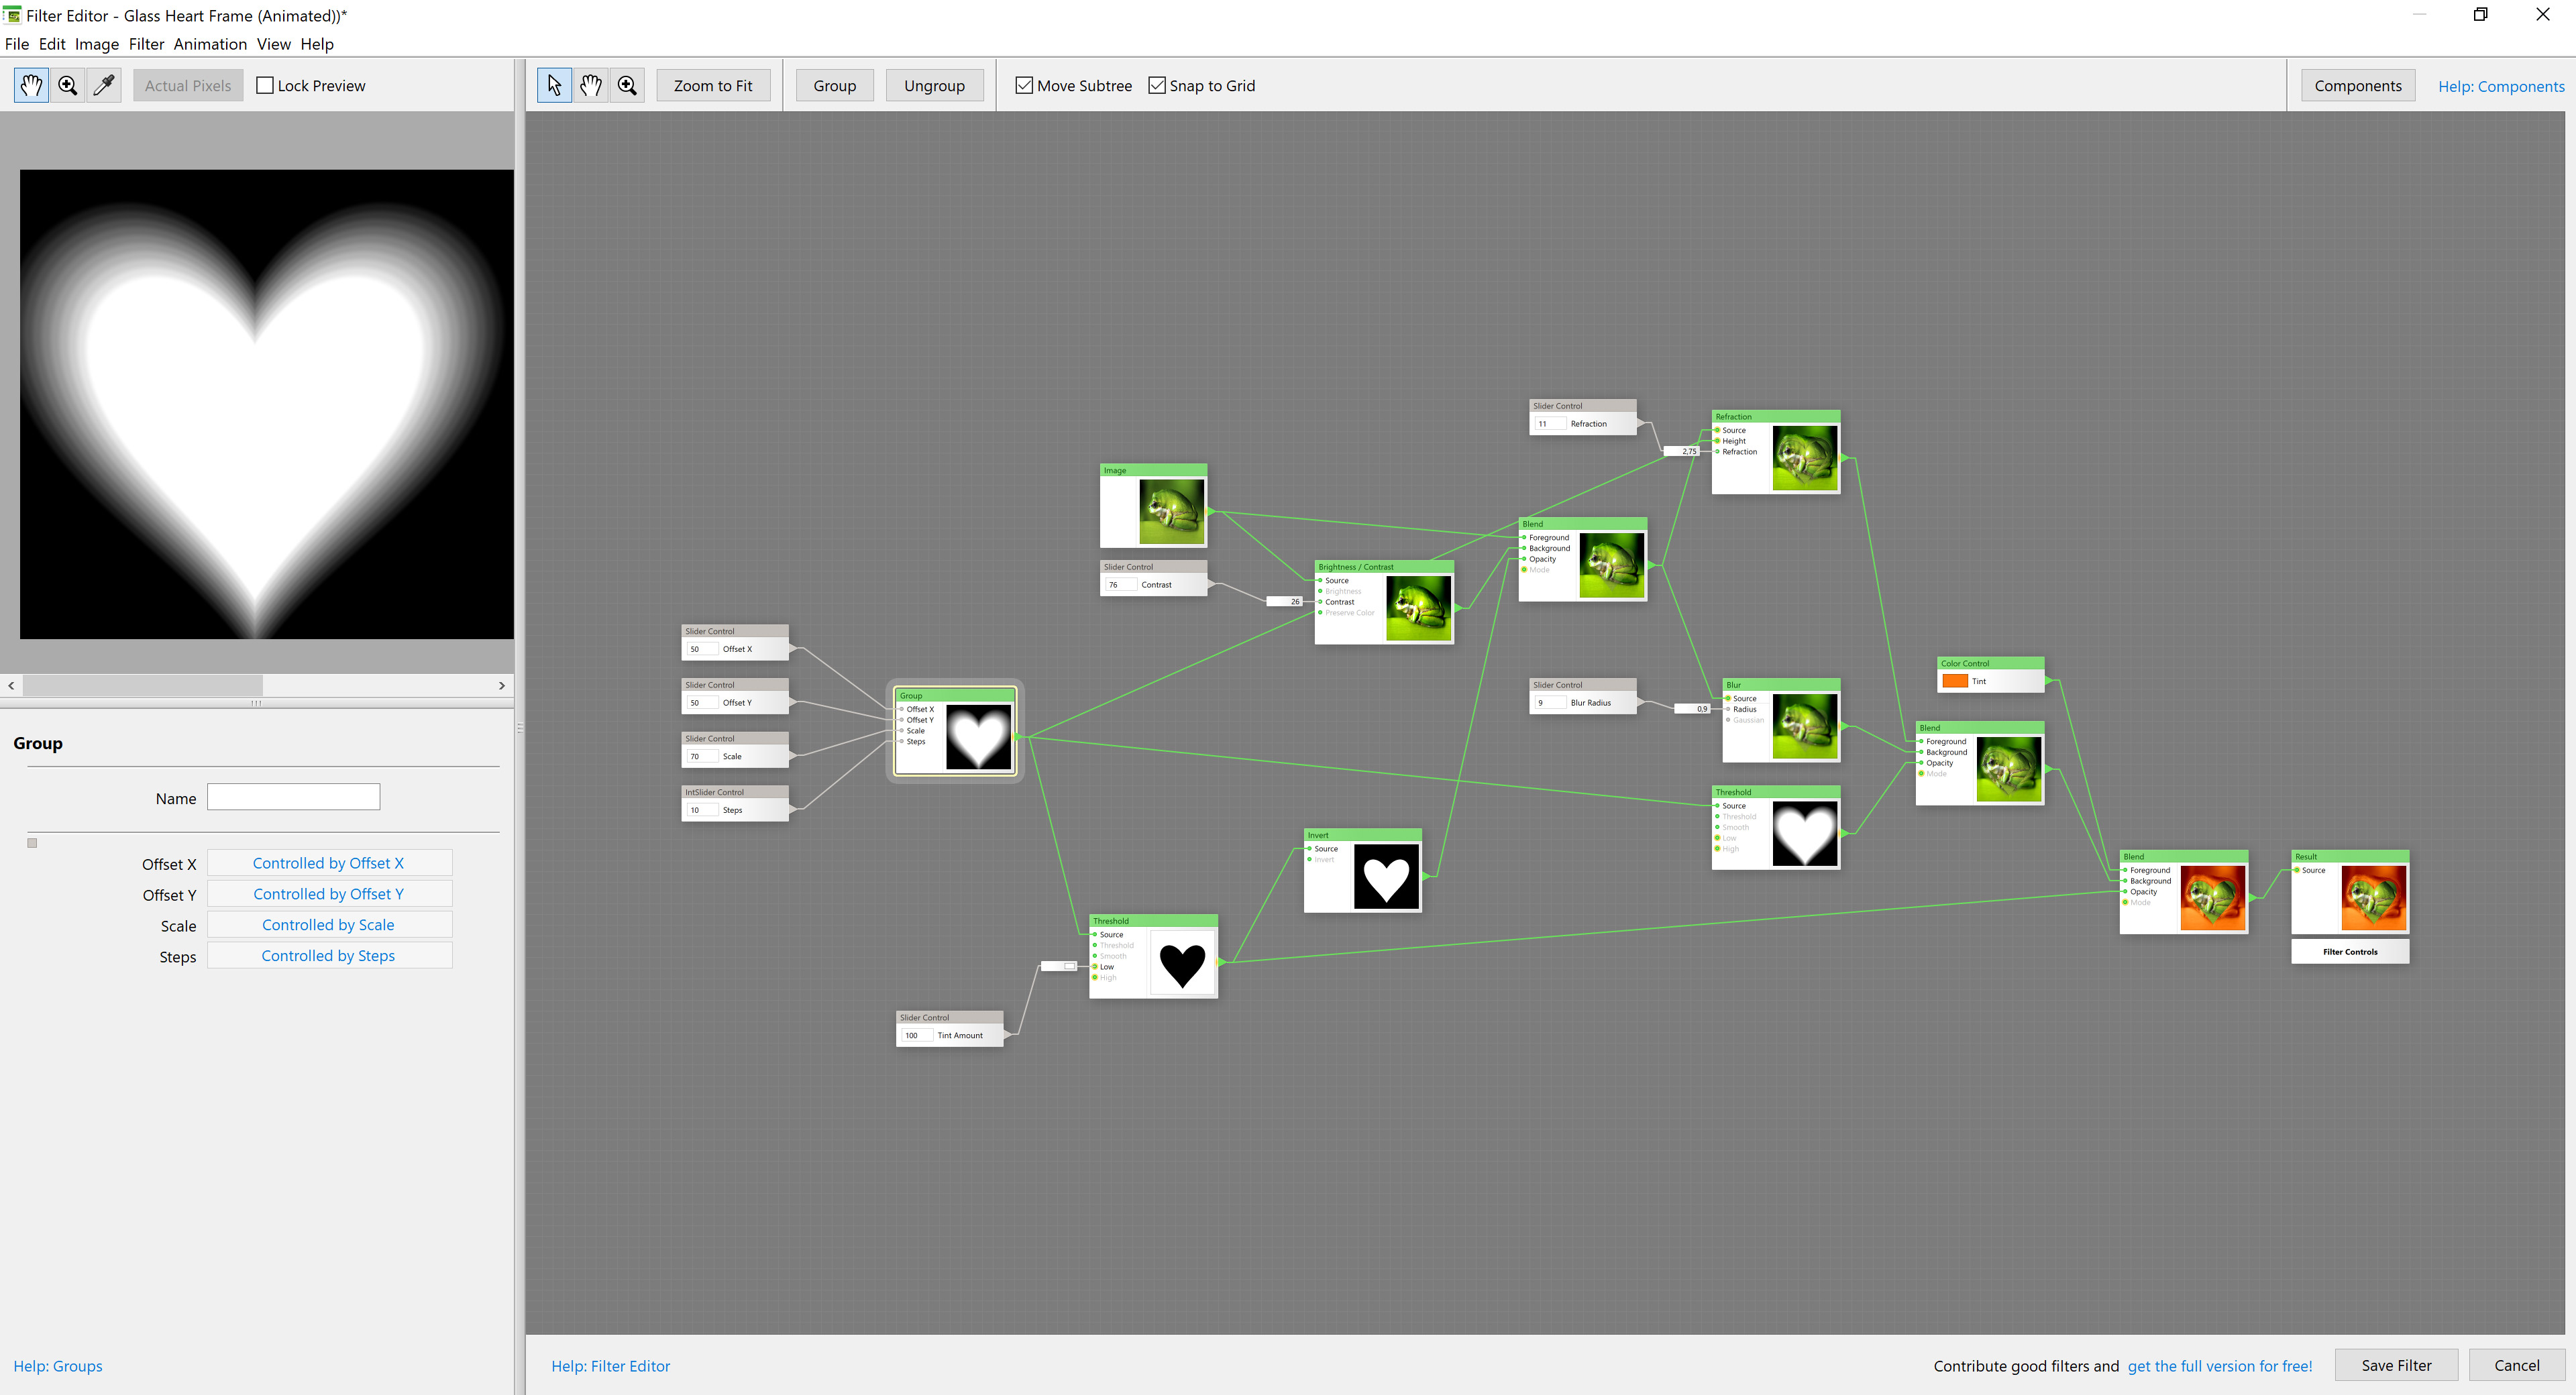
Now let's add animation to the static image. Open this filter in Filter Editor by pressing Ctrl+E (Cmd+e on Mac) or clicking the "Filter Editor" button in the main Filter Forge window. Agree to edit this filter, and you'll see the filter components on the Filter Editor canvas:
-
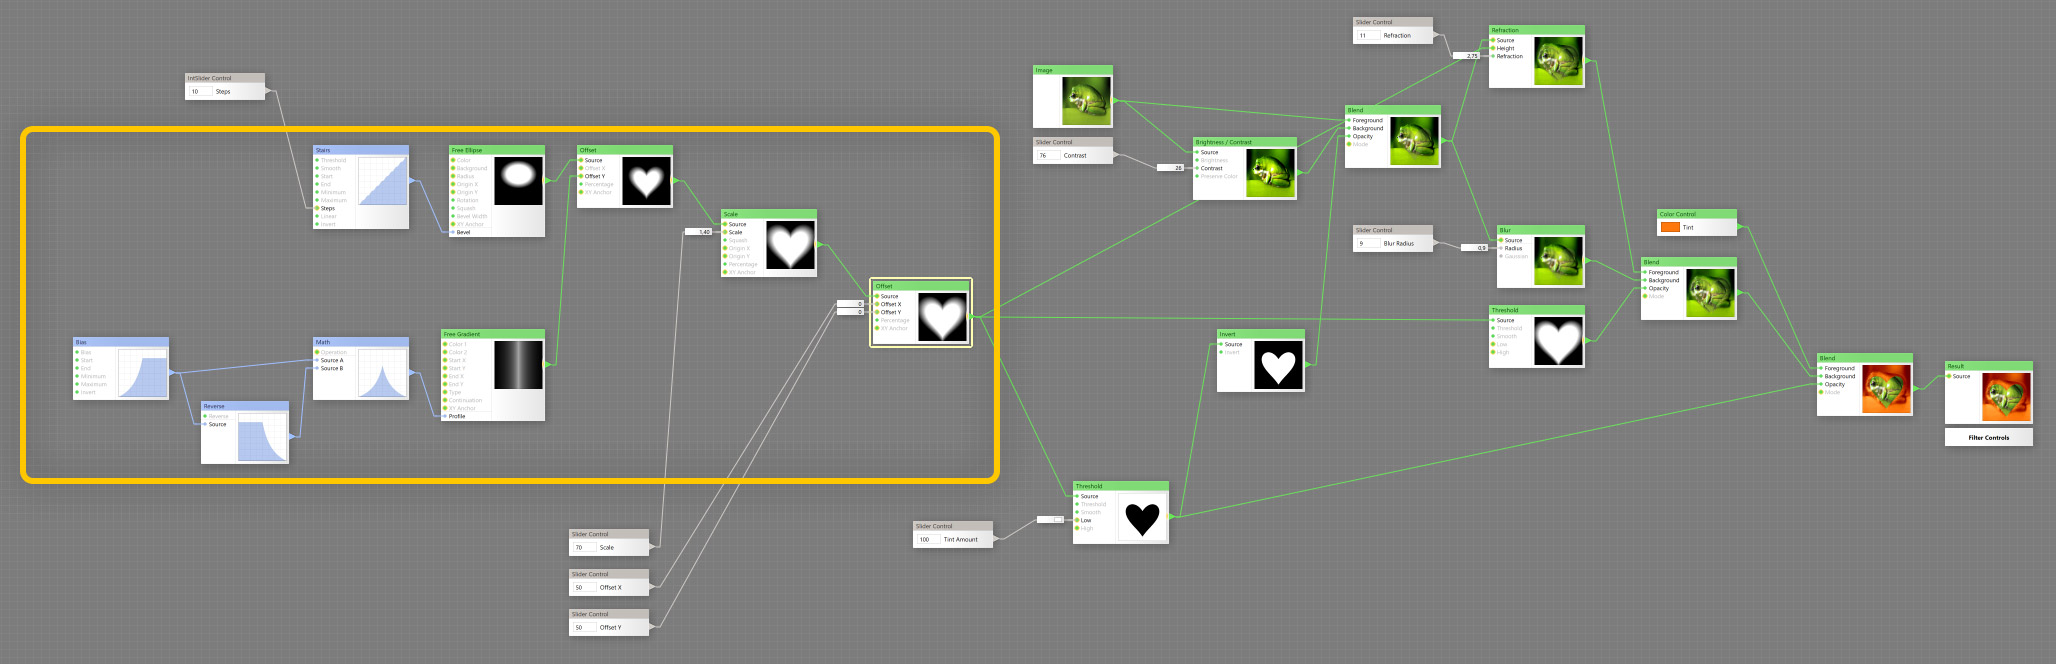
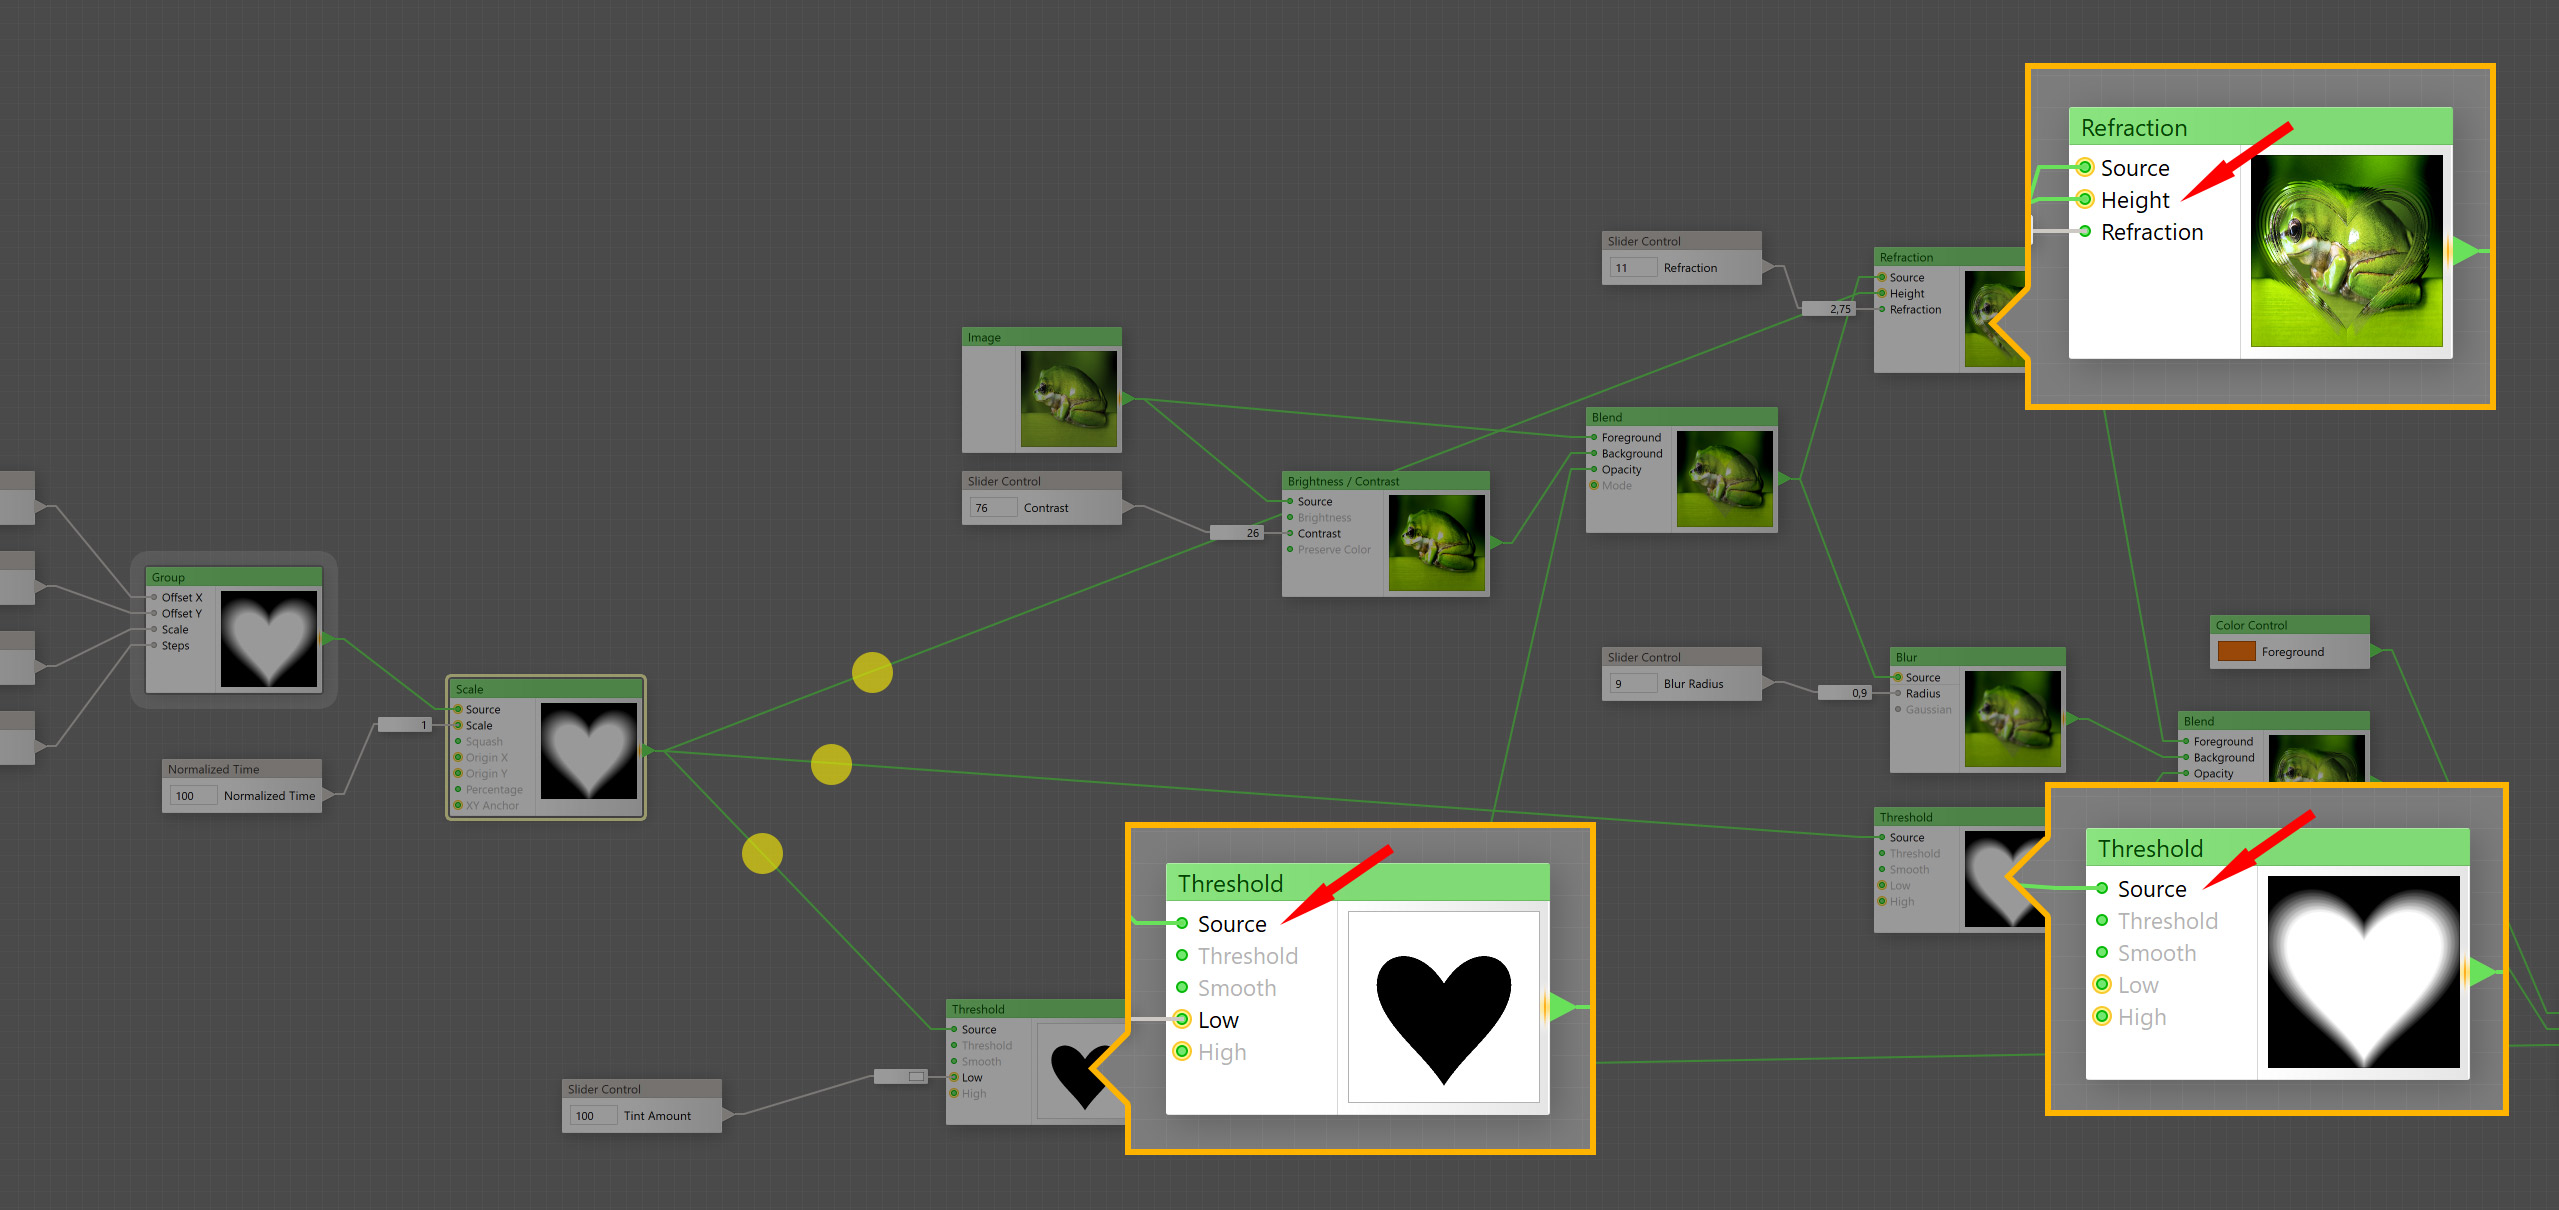
Let's inspect the filter internal structure. The frame shape, position, and size are generated by the following components on the left:
-
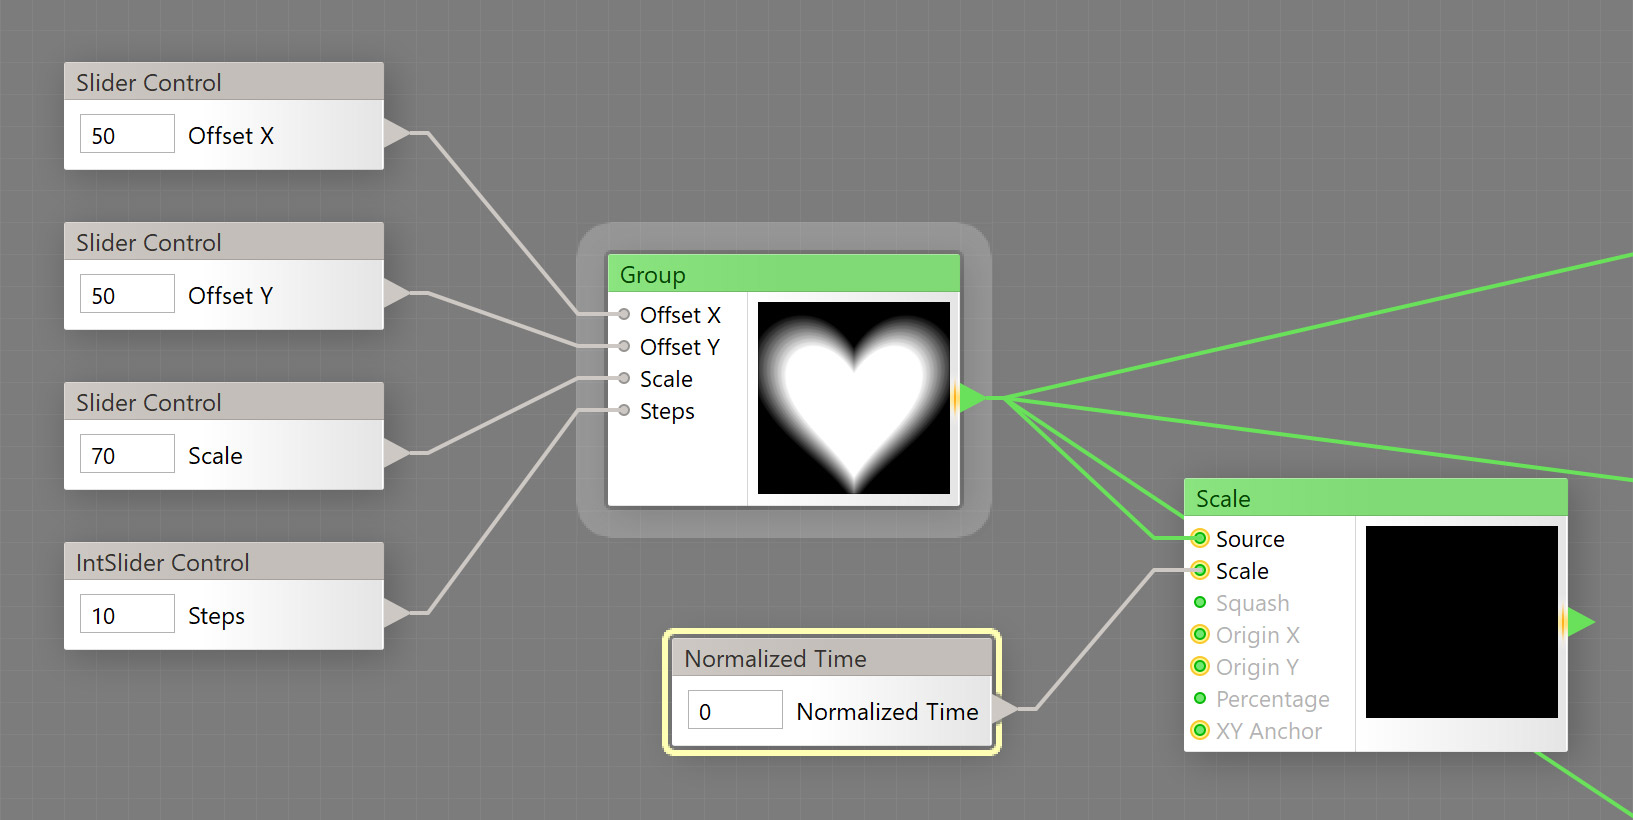
Let's combine these components into a single group to make further editing easier. The contents of this group are not going to change. Select these components (without controls) and press Ctrl+G on Windows or Cmd+G on Mac:
-
To make the frame change its size in the course of animation, we'll insert a Scale component after the frame group and connect a Normalized Time component to its Scale input:
-
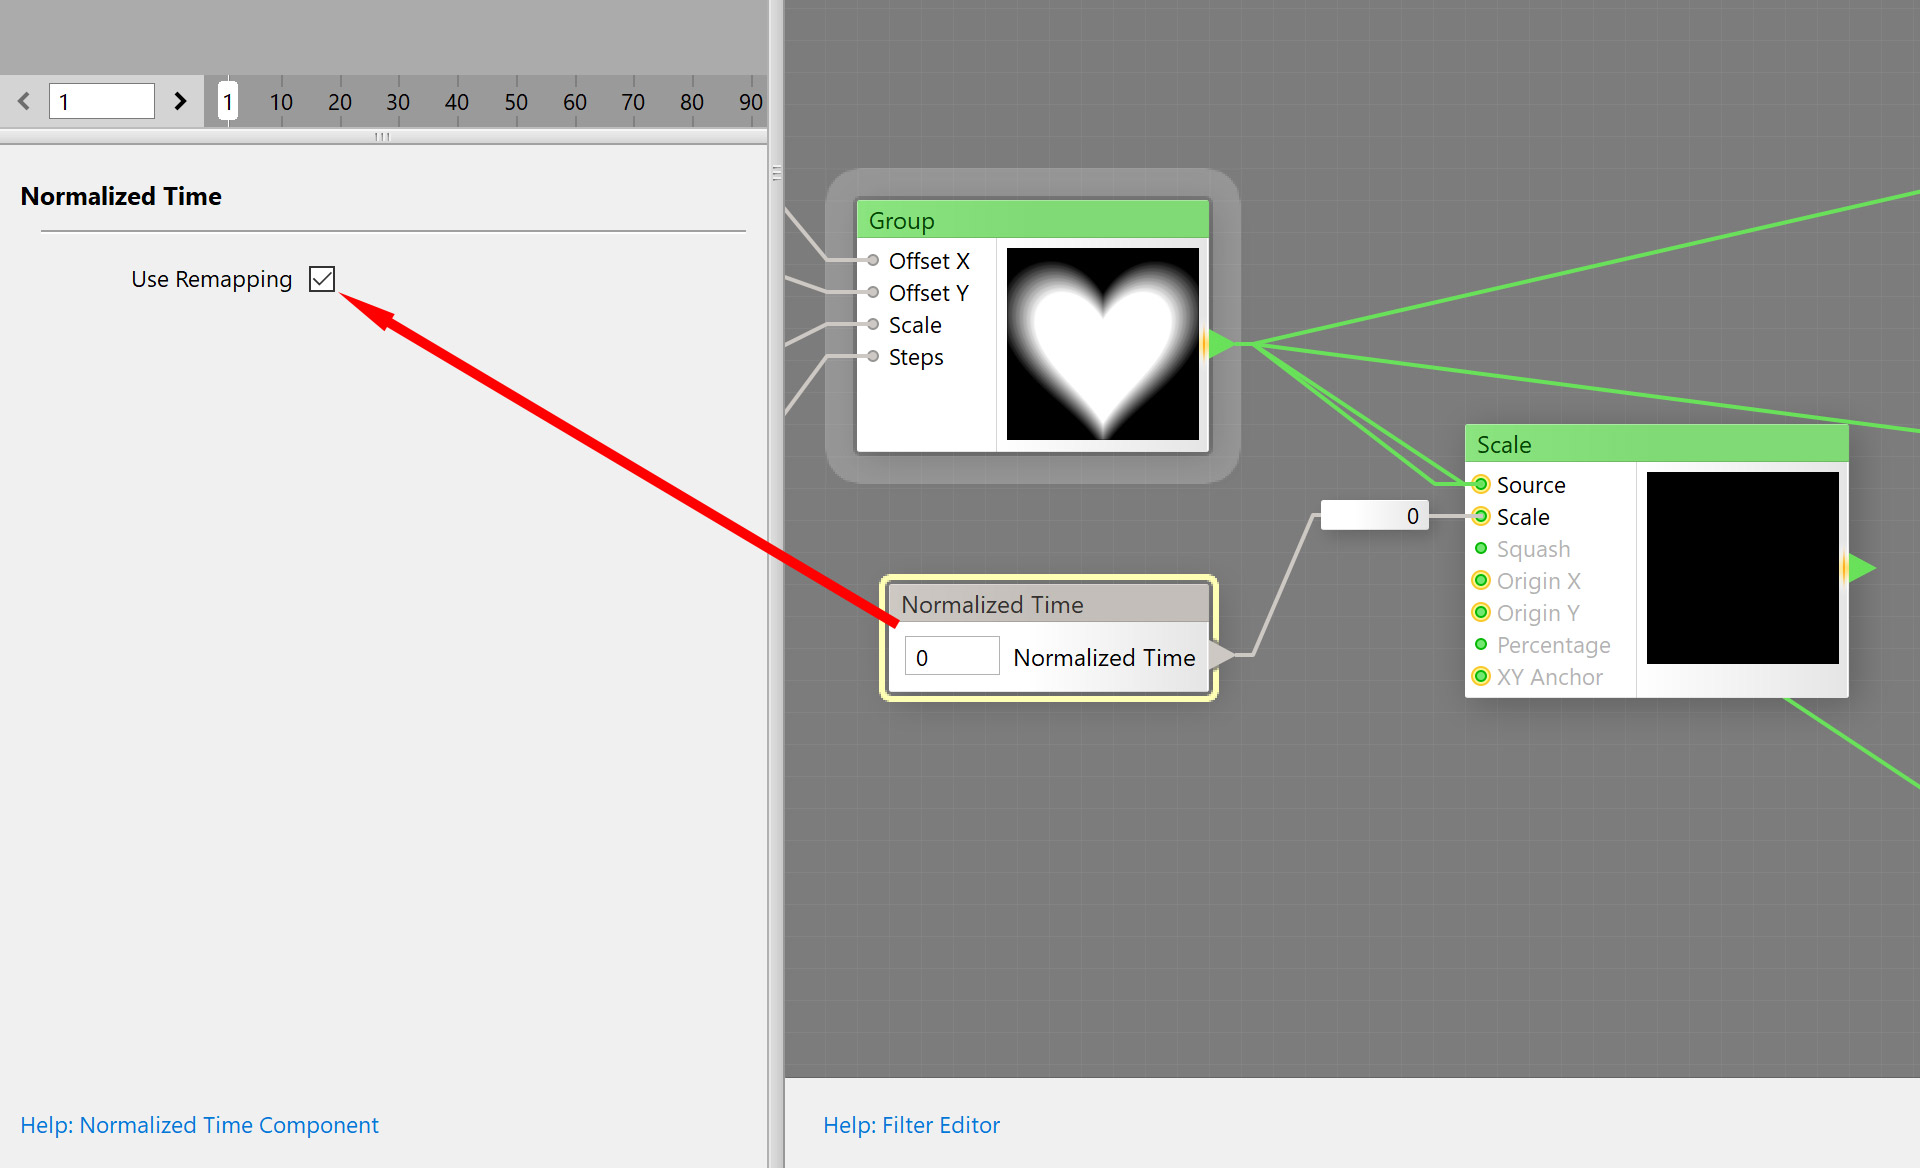
Now we'll set the starting and final frame sizes. The first animation frame will have the image frame scaled at 5x of the original, while the final animation frame will have the original frame size – the one that is set by the filter control. Select the Normalized Time component and enable Use Remapping on the component properties pane.
-
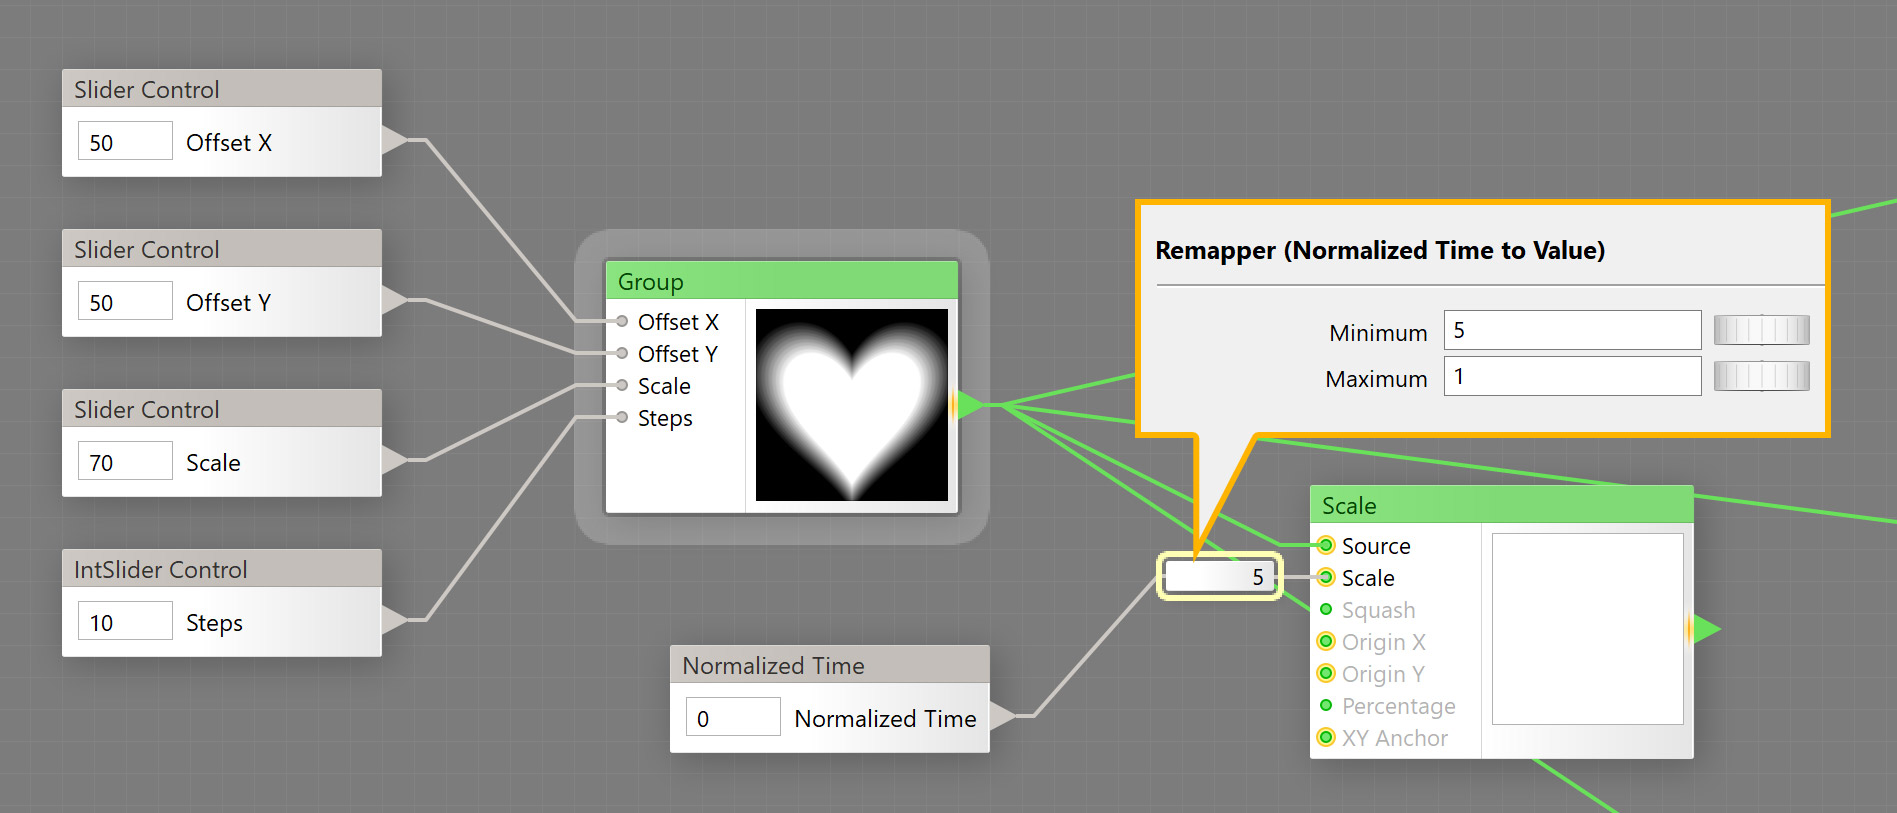
Select the remapper and set its Minimum to 5 and Maximum to 1:
-
Next, connect the newly added Scale component to the inputs of the Refraction and two Threshold components:
-
After you added Normalized Time to the filter, the timeline bar has shown up below the preview window. Drag the timeline head to view the frame changing its size. To check the final result set the timeline head to the last animation frame.
-
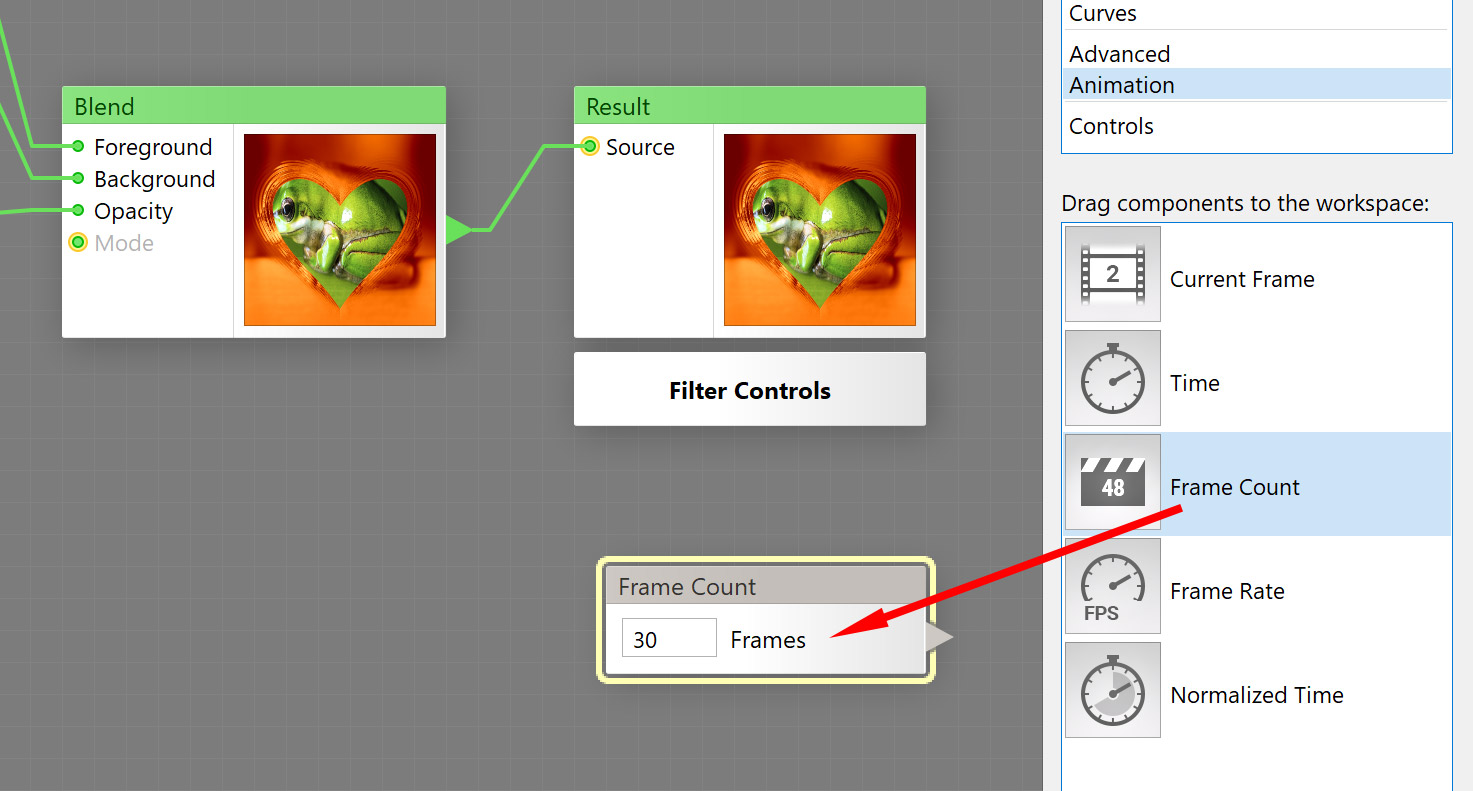
By default, our animation contains 90 frames. Let's make it shorter and change the length to 30 frames, add a Frame Count component and set its value to 30.
-
Save the filter by selecting File > Save Filter. Note that our changes to the filter structure will invalidate the presets, so you may want to update presets on the Presets tab. Here is the final filter:
https://www.filterforge.com/filters/16039.html -
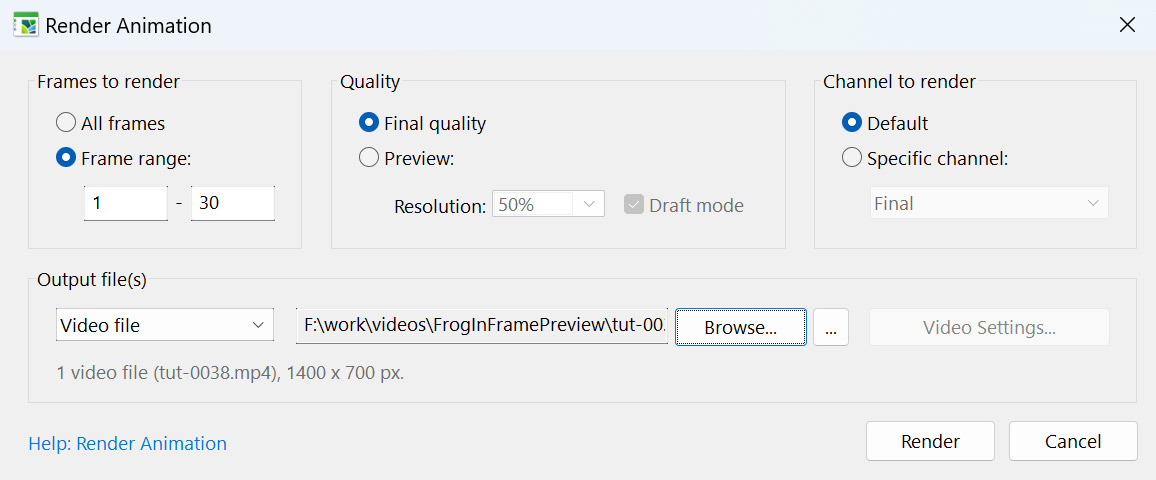
Finally, render a video file that comprises our animation: select File > Render Animation and set the output path for the final render:
Here is the video of the animation:
Tutorial by Kochubey. Feb 16, 2022.