The Artboard Properties dialog allows you to set up everything you need to render a resulting image or video in a project. The dialog is accessible by choosing Properties from the ![]() triangle menu on the Projects panel. Newly-created projects don't have a default artboard, you need to create one first.
triangle menu on the Projects panel. Newly-created projects don't have a default artboard, you need to create one first.
When you create an artboard, you need to give it a name and create a blank new solid-color image, or choose a source image file, a video file or an image sequence from disk. Then you can apply a project filter with specific settings to the artboard. If a project is meant to render multiple images, you'll need to create that many artboards. For instance, if you are working on a project that involves a floor texture for a video game in three different sizes, you may want artboards called "Large Floor Texture" – 512 x 512 px, ""Medium Floor Texture" – 256 x 256 px, and "Small Floor Texture" – 128 x 128 px".
Every artboard is opened in a separate tab. You can have multiple artboard tabs open at a time to preview and render the results. Also, you can have both artboard and regular (non-project) tabs open in the same Filter Forge window.
Artboard Name
The artboard name cannot be empty, it should conform to general file naming restrictions and cannot contain the following characters: /\:*?”<>
Background Source Tab

You can choose either a blank new image, an imported image, or an external video/image sequence to be used as a basis for your artboard.
If Blank Image is selected, set the image dimensions in pixels, its background color and transparency.
If Imported Image is selected, choose an imported image file from the dropdown list or import a new one via the Import... button.
If External Video or Sequence is selected, select an image futile on disk, and all files in this set will be loaded automatically. This allows you to apply an effect to all image files in a folder.
If External Video or Sequence is selected, select a video file or an image set from disk. If you select a sequentially named image file, all files in the sequence will be loaded automatically. This allows you to apply an effect to all image files in a folder.
Animation Tab
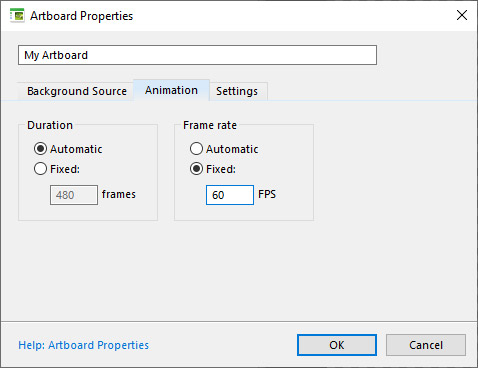
The Animation tab allows you to override the duration and frame rate of the animated filter currently loaded into the artboard. If the filter is not animated, these settings have no effect.
The Duration selector allows you to override the animation frame count defined in animated filters. When Duration is set to Automatic, the animation duration is defined by the video loaded in the External Video tab, or, in the absence of the external video source, by the Frame Count component in the animated filter. When Duration is set to Fixed, the frame count is force-set to the specified value. This value also defines the length of the Timeline.
The Frame Rate selector allows you to override the animation frame rate defined in animated filters. When Frame Rate is set to Automatic, the rate is defined by the video loaded in the External Video tab, or, in the absence of the external video source, by the Frame Rate component in the animated filter. When Frame Rate is set to Fixed, the rate is force-set to the specified value.
Settings Tab
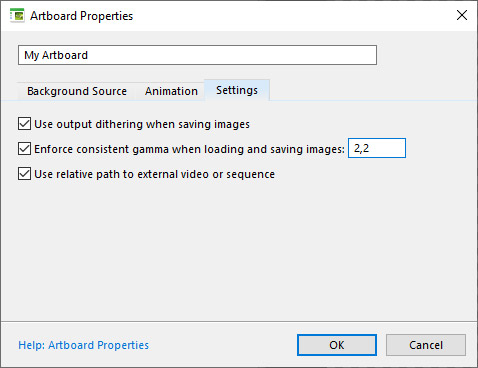
Use output dithering when saving images
When turned on, the renderer applies dithering to the output image. Dithering is a method of simulating shades that are absent in the color palette by mixing pixels of the nearest colors available in the palette. Dithering helps reduce unwanted artifacts known as color banding that occur in color gradients during the conversion from the internal Filter Forge color depth (double-precision floating point) to the target color depth (usually 8 or 16 bit per channel). Filter Forge uses noise-based dithering (as opposed to pattern-based dithering). This option is turned on by default and improves resulting image quality while sacrificing speed a bit.
Enforce consistent gamma when loading and saving images
This option ensures that all images are encoded in monitor gamma after they are loaded into or saved by Filter Forge. If the gamma of the image you load or save differs from the specified value, the image will be gamma-corrected. This option is turned on by default and is recommended for users who just want their images to look consistent with other image-editing applications.
Use relative paths to external video or sequence
This option switches between the relative and absolute file paths when referencing external files on disk. When this option is turned on (by default), it allows you to move the external files together with the project file; when turned off, it allows you to "pin" the external file location in the filesystem.